In order to understand the purpose and types of horseshoes, it is advisable to turn, oddly enough, to the shoes that a person wears. It was created a long time ago with the aim of protecting feet from negative external factors (climatic, biological, anthropogenic). Practical function is closely related to comfort, so shoes are selected with an understanding of where and when they need to be worn. For example, in hiking conditions, preference should be given to comfortable boots that do not restrict movement, but high heels will be inappropriate, felt boots with fur, light moccasins, sandals are worn according to the weather and season, orthopedic shoes are indicated for problems with the musculoskeletal system, etc.
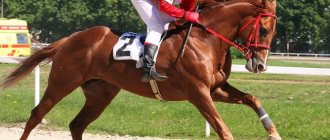
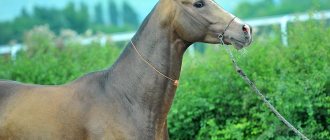
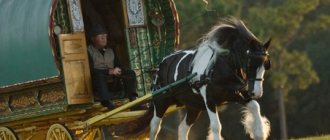
Horseshoes for horses are selected using a similar principle. It is a metal plate that is placed on the horse's hoof to protect it from damage and injury. Its presence is fundamentally important, since a horse is a heavy animal, spends almost all its time on the move, and the surface on which it walks can be different.
Depending on the activity the horse is involved in, there are several types of horseshoes. So, there are horseshoes that are suitable for the build of the average horse and its physical activity - standard ones. They are sized (there are 13 sizes of horseshoes ) and can be equipped with spikes (to prevent slipping in the autumn-winter period). The only difference in shape is that the horseshoes for the front hooves are made more rounded.
Jumping or dressage requires thin and perfectly fitting horseshoes, that is, ones that do not extend beyond the hoof. Finally, orthopedic horseshoes, as you might guess, are designed to correct horse movements, correct hoof defects, prevent diseases of the musculoskeletal system and relax. These horseshoes are made strictly according to measurements, taking into account a specific problem or task, and their “wearing” is prescribed by a veterinarian.
What is a hoof: anatomical and physiological features of this body segment in horses
The hoof is a horny growth that forms around the phalanges of a horse.
In fact, the horny tissue of this formation is a transformed, calloused epidermis. A person also has similar growths on each finger, designed to protect the soft flesh from various damage and help us cope with food and other objects. We are talking about nails, which from an anatomical point of view have much in common with a horse's hoof.
Why are the hooves covered with horny tissue and not any other? The thing is that such a small part of the animal’s body must withstand:
- the horse's own body weight;
- the impact force that occurs upon contact with the ground.
At the same time, the task of the hooves is not only to allow the horse to move, but also to protect the joints of its limbs from deformation.
This is what a horse's hoof looks like
This animal is a distant ancestor of the following modern animals:
- horses;
- zebras;
- donkeys
It was a herbivore, had no strength to resist attacks from predators, and tried to lead a calm, peaceful lifestyle.
Eohippus, instead of the hooves we are considering today, had small paws topped with claws, which allowed him to run quickly. However, forced to hide from predators, Eohippus ran so fast, covering long distances, that his paws could not withstand the load without starting to deform.
Scientists were able to reconstruct what the ancestor of horses, the animal Eohippus, looked like after lengthy research.
This deformation was as follows:
- the central fingers of Eohippus, as well as the claws on these fingers, began to harden and strengthen;
- Due to the almost complete absence of load on them, the animal’s lateral fingers began to weaken and lose size.
Over time, the lateral processes of Eohippus completely became part of the middle fingers. As a result, this formation over time turned into something similar to modern horse hooves. At its core, this part of the horse’s body is simply the horse’s only finger, unusually developed, which is covered with a hard protective layer of horny tissue.
Signs of a Healthy Hoof
In order for an animal to develop healthy hooves, it is necessary to optimally distribute the load, work with the animal from time to time and timely trim the stratum corneum. A correctly formed cornea is covered with a thin layer of neat coating, without any holes or depressions. The foot is concave, without signs of naminok, which are blue-red or yellowish spots. The horny arrow is well developed, the edges are pointed, and there are no cracks, pits or crevices.
In order for an animal to develop healthy hooves, it is necessary to optimally distribute the load.
The crumbs are roundish, the shape is regular, you can see the dividing interpulpal groove. When observed, the coronal edge is rounded towards the end and moves onto the crumbs. The foot rests against the surface completely, along its entire length. On a healthy hoof, it is impossible to notice the curvature of the heel angles, and there are also no discrepancies in the place where the walls join the sole. If the animal is accustomed to stretching its limbs forward, this ends in deformation, expressed in lowering the heels and lengthening the toe.
Healthy horse hoof
How can you tell if a horse has problem hooves?
It is very difficult to determine hoof deformation in a home farm environment; even experienced horse owners often cannot cope with it. An animal can live with a hoof deformity and show absolutely no signs of the disease. To identify the disease, you must follow the following instructions:
| Step | Description |
| 1 | Learn the signs of a healthy hoof and check this part of your horse's body for deformities. Note if you notice signs that are unusual for a healthy hoof. |
| 2 | Take a close look at the individual's behavior and how it prefers to stand. A healthy pet holds its limbs vertically. If a mammal has painful hooves, it will lean forward to relieve the sore heels. |
| 3 | Watch your horse as he walks. An animal with problems during a step lands the toe first, causing subtle splashes to fly in front of it. The pet also bends its wrists, squeezing and relaxing the muscles of the front legs too much. The limb of a healthy individual always lands on the heel. |
| 4 | Remember: at what age did you shoe a horse? It happens that individuals experience hoof deformation due to early shoeing. Until the age of five years, until the bones are fully formed, the animal should not be shoed; in most cases, this leads to developmental problems. |
| 5 | See how the muscle groups in your pet's shoulder and neck are developed. If there is no depression in front of the shoulder blade, and the neck is thick and “blocky,” then the animal has excessive muscle development. Most likely, these problems appeared due to hoof deformation. |
Healthy horse stance
Foal with healthy hooves
Hoof diseases
Step-by-step instruction
The forging process involves a number of nuances. A lot depends on the horse here. For example, overly active or timid horses are shoed within several days. In the first one, they simply tap the hoof with a stick. Place a horseshoe on the second one and lightly hit it with a hammer. Another day they shoe one hoof and then all the others.
The horseshoeing process itself takes place in the following stages:
- The performer lifts the horse's leg and carefully cleans dirt and debris from the sole with a hook.
- Using pliers, remove the old horseshoe.
- Using a hook and a knife, remove the remaining dirt and cut off excess horny tissue.
- Using a rasp, the entire surface of the hoof is leveled to a flat state.
- All other hooves are cleaned and trimmed in the same way.
- A new horseshoe is tried on the cleaned area of the sole. If it doesn't fit a little, it is adjusted on the anvil.
- Reattach the horseshoe to the hoof. If it lies down as it should, they begin to drive in the hoot. Do this alternately on each side of the horseshoe.
- The ends of the outer parts are bent so that they do not interfere.
- Using trimming, the protruding ends of the nails are cut off, after placing the animal’s hoof on a special stand.
- Finally, the walls of the hoof are filed with a rasp so that they match the dimensions of the horseshoe.
Thus, if the shoeing process is carried out correctly, the horse does not feel pain at all. But if an inexperienced executive gets down to business, he can hurt the part of the hoof where the cartilage and nerves are located. In this case, the animal will not only feel pain, but may also be seriously injured. Therefore, it is not recommended to shoe horses yourself without proper experience.
https://youtube.com/watch?v=IfQXmKDSVAM
Why do horses need horseshoes, because before, even before humans tamed and domesticated them, animals did not need them? The explanation is simple: in the wild, they do not need these devices that protect the hooves. Animals traveled long distances on soft soil or grass, choosing their own path. After they became pets and became completely dependent on humans, everything changed. If a horse served as a cab driver, he had to transport goods or people along paving stones or stone roads. The horsemen were always well armed and dressed in heavy chain mail. All this put a lot of stress on the horse's hooves. Therefore, in order to protect the soles of the animal’s feet, man came up with a kind of shoes for them - horseshoes.
Horse shoeing began to be practiced from the third or fourth century AD among those peoples who mastered metal mining. Before this, horse “shoes” were made of leather or reeds, but these shoes were short-lived. The first such horseshoes began to be used in Asia. They were replaced by hoof shoes resembling sandals made of iron. Only in the third century they invented a new form of curved horseshoes, which are almost no different from modern ones. In Russia, horse shoeing began to be practiced after the decree of Peter the Great in 1715 “On teaching blacksmithing in every province of Russian people.” Over time, the presence of a forged horse spoke about the status of its owner.
Horseshoe on a horse
Does a horse hurt when it is shod?
With skillful handling of the animal, shoeing is painless.
An experienced farrier knows the “pain points” on an animal’s hoof. This is the middle part of the hoof on the horseshoe side where the hollow runs. The hoof is a kind of “claw”. Its keratinized structure is completely insensitive. The edge of the sole of the hoof requires filing when shoeing.
How are horses shoed? When the selection of the necessary horseshoes has already been made, it is time for the preparatory process for forging.
First of all, the hoof is cleaned of dirt. For cleaning, use a hook and a special iron brush. After this, they begin to remove the old horseshoe. Here the process depends on the preferences of the farrier. Some craftsmen file away old nails, others forge and pull out nails with pliers. The main thing in this process is not to separate the stratum corneum of the hoof and not damage it.
The outer layer of the sole of the hoof is then removed. This work uses a rasp, a knife and tongs that look like giant pedicure tweezers. Using tweezers and a knife, the overgrown stratum corneum is removed, which is easy to notice by its whitish color and many cracks and chips.
After trimming, the hoof is filed with a rasp and leveled. After these procedures, measurements are taken from the hoof. Next comes the fitting and installation of the horseshoe on the hoof. For shoeing, a special machine is often used, which fixes the animal’s leg, preventing it from kicking.
For horseshoeing you will need the following tools and items:
- Horseshoe nails.
- Punch (for cleaning soles)
- Forceps
- A special forging hammer weighing no more than four hundred grams (for guiding and installing nails).
- A heavy hammer used to shape a horse's shoe on an anvil. Its weight must be at least 2.5 kg.
- Puller.
- Trimming.
- Hoof knife.
- Rivets.
- Riveter.
Planting Amur grapes in autumn. Amur grape varieties
Nails for forging are called “uhnali”. They come in different lengths. They are driven into the hoof, after which the ends of the nails protruding from the outer part of the hoof are cut off. Then, the savvy animal is taken for a walk in order to monitor its gait. If it is discovered that a shoeed horse is limping or walking unsteadily, the horse is reshod, eliminating the deficiencies in the shoeing.
A shod horse is the natural choice of the modern horse owner.
Process steps
Horse shoeing is a rather complex process, and it consists of several stages, which include:
- Choice of horseshoes.
- Preparing tools.
- Examination of the animal.
- Removing old horseshoes.
- Hoof trimming.
- Taking precise measurements for making new horseshoes.
- Fit.
- Fastening.
- Final inspection.
The first stage involves selecting “shoes” for the horse that are ideal for its size, breed and what it is used for. Of course, only an experienced farrier should do this - only then the result will be what is expected.
At the second stage, it is necessary to prepare all the tools that will be required during the work process. A farrier, or blacksmith, must have the following list of tools:
- uhnali - nails with which fastening is carried out;
- special pliers;
- pruning;
- rasp;
- special hammer;
- paring knife;
- paw;
- spike key.
Of course, in addition to this, a special machine is required. With its help, the horse can be fixed in the desired position. There are two types of machines: high and low. The former allow you to slightly raise the animal above the ground, while the latter are more stable and do not frighten the horses when they are shoed.
Then the old “shoes” are removed. At the same time, the old horse shoe should be carefully examined - this will make sure that the forging tactics and the horseshoes themselves are chosen correctly. If the defect is repeated again and again, the horse may become lame.
Next, they carry out clearing, that is, removing the dead horn. It is very easy to recognize - it is whitish-gray in color, has many cracks, and begins to crumble easily when trimmed. This peeling horn must be completely removed with a knife, and then the sole must be filed with a rasp. Only after this can you proceed to taking measurements, which are necessary for making new horseshoes, if we are talking about hand-made ones, or for purchasing factory ones of the required size.
Then adjustments should be made. It can be of two types:
- Cold. Cold fitting is more convenient because it does not agitate the animal and does not dry out the surface of the hoof.
- Hot. Hot fitting is more precise and is therefore used much more often.
When the fitting is successfully completed, you can proceed to attaching the horseshoe. To do this, they use uhnali - special nails that securely hold the “shoe” on the horse’s foot. Horse shoeing involves securing a horseshoe to the hoof using six hooks. When everyone is hooked in place, the blacksmith bites off their ends using special pliers.
At the end of these procedures, it is necessary to examine the animal. To do this, it is carried out both at a trot and at a walk. There should be no lameness or restriction of movement. If it is discovered that horse shoeing has been performed incorrectly, the defect must be corrected immediately before it leads to unpleasant consequences.
Why forge and is it worth doing? Today, equestrians and horse owners do not ask this question, because they know that this is the only way to maintain the health of a horse’s legs and hooves.
Reforging time
But you need to remember not only when and how to shoe a horse, but also about the timing of shoeing. When determining these terms, it is necessary to take into account the nature of the soil on which the horse most often moves, as well as the speed at which his hoof wall grows, which is an individual indicator.
Typically, reforging is required monthly, but in some cases it is acceptable to reforge every 45 days.
Only an experienced farrier will be able to determine the timing appropriate for a particular animal. Therefore, you need to choose a specialist who you can trust with your pet’s health.
Shoeing today is not a luxury, but a necessity that all horse owners face.
How often are horses shoeed?
The frequency of shoeing depends on the conditions in which the animal is kept and the purpose of the horse. Sports horses are reshod monthly. Sometimes, reforging times exceed forty-five days.
Why does a horse need shoeing? The fact is that a horse's hoof grows, just as the claws of other animals grow. The hoof growth process occurs unevenly. Monthly shoeing of horses allows you to better care for the animal's hooves and improves its appearance.
The main thing in forging is the material from which the horseshoe is made and the skill of the blacksmith. Modern horseshoes for horses are made on special machines from a certain durable metal. These are stamped products.
Some skilled blacksmiths make homemade forged horseshoes. They are adjusted exactly to the size of the horse's hoof. A horse forged by a blacksmith will have a clear, confident and easy gait.
There is a “hot” and “cold” method for fitting horseshoes. A blacksmith who forged a horseshoe himself and adjusted it to the size of the hoof using a “hot method” knows that this way the product will be fixed more accurately and evenly on the horse’s hoof.
The “cold method” of fitting is less frightening to the animal and does not dry out the surface of the hoof. Using modern tools, adjusting a horseshoe to the desired size is not difficult, but such work requires certain skills. Forging a horseshoe is a responsible and labor-intensive task.
Shape and size of horse hooves
It is not possible to indicate the constant size and shape of a horse’s hoof, since they can be determined by a variety of factors:
- breed of a particular horse;
- natural conditions of the country and region in which she lives;
- the load received by her limbs;
- proper hoof care, etc.
For example:
- horses that belong to heavy breeds have larger, wider and more stable hooves;
- light thoroughbred horses can boast of small, pointed and narrow hooves.
Or another example:
- if the horse lives where it is very wet, its hooves will be formed wide;
- if the horse lives in a dry place, its hooves will be narrow.
The only things that can be said with certainty regarding hoof shape and size are:
- the hind hooves are usually smaller than the front hooves;
- the soles of the hind hooves are slightly more concave.
The shape of the hooves can change constantly throughout the entire life cycle of a particular animal.
The shape of a horse's hoof is influenced by many different environmental factors, as well as the genotype of the horse itself.
It will constantly be influenced by factors such as changes in natural conditions, changes in foot placement, etc. in addition, the initial correctness of the formation of the horny base is of great importance
In order for it to develop as it should, it is necessary to pay great attention to caring for the horse, and in particular its hooves.
Further in the table we will look at the regulatory characteristics relating to the shape and size of horse hooves.
Table 2. Characteristics of horse hooves
| Parameter | Horse front hooves | Horse's hind hooves |
| The inclination of the posterior segment of the wall relative to the earth's surface | Approximately 50 degrees | Around 55-60 degrees |
| The heel part of the hoof is already toe | 2.5 – 3 times | Exactly 2 times |
| Shape of the edge of the sole of the hoof | Round, widest in the middle | Narrow, more oval in shape, the widest segment lies at the edge of the back of the foot |
| Sole of the hoof | Thin-layer, almost smooth, thickness about 10 millimeters | Thickened, has a concave bend |
Some parameters of a horse's hoof may vary depending on the location of a given segment of the horse's leg relative to the ground.
Please note: most of the parameters listed above will change depending on the exact position of the animal’s leg:
- straightened in the rack;
- bent when walking or running.
So, provided that the leg is straight, the coronal segment of the hoof will be lowered, therefore:
- the wall will become wider;
- the sole of the hoof will narrow.
Provided the horse lifts his leg, everything will return to normal.
Purpose and frequency of horseshoeing
In the modern world, horses live in a stable. They move less than their wild counterparts, so their hooves become softer. At the same time, horses do hard work, so the load on their legs is quite large. As a result, the hooves wear out faster than they grow. Horses with worn hooves experience pain, limp, or refuse to walk at all.
Even in ancient times, people tried to protect the hooves of the horses that served them. Then they used unique boots made of metal. Over time, it became clear that such shoes brought discomfort to the animal. To improve the quality of life of horses, they came up with smaller pads made of durable metal.
A shod horse does not experience discomfort from constant contact with asphalt or concrete road surfaces. In winter, the horseshoe is equipped with special spikes to improve the stability of the horse. The pads are changed periodically. The frequency of shoeing depends on the living conditions and main activity of the animal.
The horse's hooves grow, and unevenly. Proper care involves changing horseshoes once a month. It is important that the horseshoes match the size of the hooves.
If everything is done correctly, the horse will walk easily and confidently.
Varieties of horseshoes
Horses are used not only for movement and transportation of heavy loads. Based on the purpose of their breeding, there are several main types of horseshoes:
- Standard. Initially, this type was made by hand, which was very hard work. Since it was necessary to make a very strong, undivided metal plate. In the modern world, such manipulations are carried out mechanically, using special tools and machines. Therefore, all horseshoes are made according to a standard design and are absolutely identical.
They differ only in size. There are 13 main sizes.
Horseshoes, which are intended for the front legs, are slightly rounded, and for the hind legs - oval.
Basically, the standard type is used for horses that are used for working purposes. Also, they are widely used in winter. This is due to the fact that they have spikes on them that prevent slipping.
To participate in competitions. Such events require the horse to be graceful and fluid in movement. Therefore, only light and thin horseshoes are used, which, in their width, do not exceed the size of the horny part of the hoof itself. To avoid injury, the heel part of the horseshoe, which is attached to the front hooves, is slightly beveled inward. Horseshoes that have a beveled lapel are also attached to the hind legs. For horses. Considering that racehorses have to move around a lot, putting a lot of stress on their hooves, horseshoes should be as comfortable as possible. Therefore, all measurements of parameters are carried out individually for each animal. The plates that are used to make horseshoes for horses are lightweight and weigh no more than 120 grams. While their width is less than eight millimeters. To make movements clearer and easier, exclusively spring steel is used. For games and jogging. During the races, the horse shows maximum results in endurance and speed
Therefore, it is very important to choose horseshoes according to weather conditions. In the dry season, heavier options are used, and in wet weather, angular plates on which heavy and voluminous branches are placed.
Spiked horseshoes are prohibited in games and races. Because they may cause injury or damage.
- Orthopedic. Such horseshoes are made for horses with defects in hoof development or for injured animals. Thanks to their design, they greatly facilitate the walking process and reliably fix the hoof in the correct position.
Trimming the sole
The horny part of the horse's hoof grows quickly (much like human nails). And sometimes not too evenly. Therefore, before attaching the horseshoe, the sole should be leveled. Among other things, this procedure in some cases allows you to correct the incorrect positioning of the animal’s legs. A shod horse with a similar defect can be used more intensively in work. The hooves are trimmed using a rasp in the direction from the heel parts. In this case, only the cracked dead horn is removed (leaving a thin layer). Pruning should be done as carefully as possible. If too thin a layer is removed from the hoof, the horn may subsequently break off. If the farrier, on the contrary, “overdoes it,” the horse may be injured when used for work.
How to make horseshoes correctly
Shoes of horses are carried out by specially trained people - farriers. They know how to properly shoe a domestic horse, what types of horseshoes there are, how long they will last and how not to hurt the animal. Usually, good specialists are involved in both manufacturing and shoeing animals. They work in equestrian clubs and can often provide this service on the road for a fee.
In fact, everything is not as simple as it seems at first glance. Forging is a job that requires considerable physical strength and nervous stability. It can sometimes be traumatic if the horse is nervous or not accustomed to shoeing, so the first step in this process is to restrain the horse. A calm horse is usually tied by a halter. If the animal is nervous and violent, then it will have to be placed in a pen.
How to shoe a horse correctly? Of course, shoeing begins with a hoof measurement, which is transferred to a special steel bar. This strip is then cut to the required size, heated and cooled in water, after which the ends are gradually processed. Then this workpiece is heated again, but without cooling, giving it the desired shape. But the work does not end there, since such a heel does not yet have holes for nails. In order to make such holes, a groove is marked, this is usually done with a compass. Then the product is heated again and holes are punched for the nails (uhnali). After this, the finished horseshoe is polished to avoid unwanted injury to the horse. Only after all safety measures have been fulfilled do they begin to shoe the horse.
Horse shoeing stages
If this is not a young horse and it already has a heel, then the old horseshoe must be removed. There are special tools for this: forging hammer, trimmers and pliers. If broken nails remain in a horse's horseshoe, they must be removed. No matter how tightly the heel fits, if a gap remains and debris gets in, the hoof must be trimmed. To do this, use a hoof hook and a brush. Also at this stage, the hoof horn, if it has been deformed, is given the correct shape. Now you can take measurements to find out what number the horse needs. To do this, the hoof is measured by length, width between the walls and at the heels. It often happens that the horseshoe does not fit the hoof perfectly, since each horse is unique. In this case, the farrier refines it on an anvil. The horseshoe is placed on the hoof and very carefully secured with nails. The nails that come out are cut off near the hoof horn, then special pliers are placed under them and clamped with a hammer to tighten the heel and hoof. Next, the sharp edges are polished with a rasp.
You should be very careful and careful, as incorrect heeling and installation itself can leave the horse disabled. To shoe your pet yourself, you need to learn from an experienced and competent farrier, and even better, make your first attempts under the supervision of a specialist.
Useful tips for farmers
After you have shod the horse, you need to check if it is comfortable. To do this, you need to walk the pet at a walk, and if the horse does not start limping at a trot, it means that the heel is installed correctly. An indicator that a horse is well shod is its calm walking and running without limping. It is also recommended not to immediately load a newly shod horse. Making a horseshoe does not take much time. For 2 experienced farriers this takes 15 minutes.
Naturally, making a horseshoe alone will require much more time and effort. How often should a horse be shoed? This question cannot be answered unambiguously, since it depends on many factors, such as the degree of load, wear, and sometimes simply damage to the horseshoe. On average, horseshoes are changed once a month (30 days). It is not recommended to do this more often unless absolutely necessary, in order to avoid hoof diseases.
Ultimately, shoeing a stallion is a fairly simple task if you know someone who can help with this matter or teach the correct procedure. If you follow all the rules for shoeing and walking horses, raising healthy and hardy horses will be as easy as shelling pears.
Why is this necessary?
A horseshoe is a means of protecting the hoof horn from damage and premature wear, and the sensitive tissues of the hoof from diseases.
Under natural conditions, the processes of abrasion and regeneration of the hoof horn are balanced and proceed parallel to each other. The need for protection arose when the horse began to receive unnatural stress. Pressure on your back is also pressure on your legs. With the development of civilization and the advent of hard surfaces on roads, the wear of hooves increased even more, and already in ancient times people began to “shoe” their horses.
The ancient horseshoes of those times were not yet similar to those of today. The Romans, for example, put hipposandals on their horses’ feet—iron plate-soles secured with belts. Europeans began nailing heels much later. To this day, this method of fastening remains the simplest and most reliable.
Modern horse shoeing performs the following tasks:
- protects the hoof from mechanical abrasion;
- gives the animal stability on slippery surfaces;
- minimizes the risk of foot injury;
- corrects orthopedic disorders (improper hoof placement, etc.).
The foal begins to learn to offer its foot for shoeing at three months.
How often does replacement occur?
New horseshoes are required approximately every 45 days. This order came from the Russian cavalry. Although at that time the horses in their stalls had a clay floor covered with sawdust. Today, asphalt pavement is more common. Cavalry horses galloped more often on grass and earth, rather than on sand in an arena or stone pavement.
Replacement time is approximate. Individual characteristics are also taken into account. In different individuals under the same conditions, the cornea grows at different rates. Some people have their horseshoes changed every month, others walk normally even two months.
Much depends on nutrition and exercise. Movement and proper diet help maintain proper metabolism. Overfeeding, for example, oats, also harms the condition of the hooves.
Shoeing a horse is a procedure that requires skill and certain knowledge. Few do the job correctly, which can lead to serious consequences. It is better to consult a veterinarian and entrust this matter to a good farrier.
How to shoe a horse
In order to properly and efficiently shoe a horse, every horse breeder must have on his farm:
- a brush with medium-hard hair - with its help, the hoof is cleaned from dirt, residual manure and other things;
- trimming - for bending the rivets of horseshoe nails;
- hoof hook - to remove frozen dirt;
- hoof cutter - to remove the old stratum corneum;
- hoof rasp - for polishing the hoof;
- hoof pliers - for removing rivets from horseshoes;
- an anvil and a forging hammer weighing at least 500 g - for leveling and adjusting the size of the horseshoe.
The main stages of shoeing a horse:
- The first thing to do before the procedure is to tie the horse to a strong support. Horseshoeing often ends in severe stress for the animal (especially for young individuals), so the animal can jerk sharply and hit the owner. Next, you need to wrap and secure the horse's limb so that you have free access to the entire hoof, while being sure to avoid unnatural bending of the joints. Otherwise, the animal may react very negatively to the procedure.
- If you are faced with the task of shoeing an adult horse, then before the procedure you need to remove the existing horseshoes. To do this, take a trimmer, a forging hammer and straighten the caps of the rivets, and then pull them out of the hoof one by one with pliers. If, after removing the rivets, the horseshoe does not fall off on its own, grab it by the edge with pliers and slightly pull it to the side.
- No matter how well the shoeing is carried out, the remains of dirt and manure under the horseshoe can cause inflammation and infectious lesions of the hoof. Therefore, using a hoof hook and a brush, it is necessary to remove all remaining dirt, and also thoroughly wash the horse’s foot with a soap solution. After the completed procedure, the soles are wiped dry.
- Horseshoeing is carried out exclusively on a flat sole; the heel must fit perfectly to the hoof, otherwise dirt and manure can get into the cracks and cause inflammation of the horse’s soles. To avoid this, you need to eliminate unevenness and various chips in the hoof. This is done with an extremely sharp hoof incisor, so you must be careful not to injure the animal. At this stage, the stratum corneum of the feet is also shortened - the optimal length of the hoof is about 7 cm (from the hair growth area). At the end of the procedure, the horse's foot is polished using a rasp.
- When the horse is fully prepared, you can begin to determine the size of the future heel - for this, each hoof is measured in length and width, and after that the required size and type of future heels is selected.
- Quite often a situation arises when a horseshoe does not have the ideal shape. In this case, it must be aligned with the shape of each hoof using an anvil and a forging hammer. A smooth heel should be in contact with the hoof without any gaps, and also completely follow its contours.
- When the horseshoe is completely prepared, it can be fixed on the hoof. The rivets are hammered into the foot one by one, using a forging hammer, and only into special holes in the horseshoe. The rivets that come out near the hoof horn must be trimmed. After this, pliers are placed under them, and then pressed with a hammer in order to pull the horseshoe to the sole. At the end, all sharp edges are sanded with a rasp.
- When the procedure is completed with one limb, you can begin shoeing the next one.
Important! It is necessary to re-shoe each foot: neglecting this rule can negatively affect the animal’s posture and even lead to serious injuries to the limbs. How to shoe a horse: video
How to shoe a horse: video
Story
Old Russian horseshoe, Ryazan principality, 13th century.
The first devices were woven in the form of a stocking or shoe from bast, reed, leather, and plant fibers. They were secured above the crown of the hoof under the brush with ropes or belts. These shoes were fragile; strengthening them with ropes or belts caused dermatitis. The plantar surfaces of the hooves of draft animals were covered with resin.
The Romans used metal plates, mostly oval in shape, with hooks, bows, ears or rings to protect the plantar surface of the hoof, and to secure the plate on the hoof with a rope or belt. Such plates for horses were called hipposandals
, for mules -
mulosandals
, for bulls -
bare sandals
.
The method of shoeing horses was first used by the Gauls around the 4th–3rd centuries. BC e.
In the Middle Ages, they learned to fasten metal horseshoes with special nails - uhnals.
In Russia, the forging business began to develop at the state level after the Decree of Peter I in 1715: “In Moscow and the provinces, find good blacksmiths, take two people to each province and order them to teach blacksmithing to Russians...”. In 1732, the first farrier school in Europe was opened in the village of Khoroshevo near Moscow.
Horseshoe design
A simple horseshoe is a curved plate that has 2 branches. The inner part is adjacent to the hoof, and the outer part touches the ground. There is a hook or flap at the front. The horseshoe has a path for nails and holes for spikes. They help connect the horseshoe to the ground.
The part of the product that is adjacent to the horny covering can be divided into external and internal. The first element has a larger area
It is important that it is as level as possible, since it provides support for the hoof.
There is a nail track at the bottom. After fixing the nail heads, they are buried in it. This prevents them from being erased. There is no path in the toe and heel area.
Modern horseshoes differ in shape, material, thickness and other parameters, depending on their purpose. Simple products are made of steel with a low carbon content, which can be adjusted not only when hot, but also without heating. For the forelimbs, rounded horseshoes are used, for the hind limbs - slightly elongated, which is due to the natural configuration of the hoof horn.
A simple horseshoe is a curved plate with holes, and each element of this plate has its own name:
- branches - parts of the canvas from the toe to the heel. There are internal and external branches;
- upper surface - the plane adjacent to the hoof;
- lower (outer) surface – plane in contact with the ground;
- hook (lapel) – a small vertical protrusion in the front part of the canvas;
- nail track;
- inner and outer side edges;
- holes for spikes;
- nail holes;
- heel – rounded end of the branch;
- Spikes are devices that improve the grip of horseshoes on the ground. Installed if necessary, for example, in icy conditions or for racing on frozen grass.
In general, the canvas is conventionally divided into three parts - toe, side, rear. The surface adjacent to the horn is also divided into two zones, external and internal. The outer one is larger in area, since it is a support for the hoof, and it must be perfectly level. If the branches of the horseshoe are in different planes or have unevenness, the canvas will not be able to fit tightly to the hoof, the load will be distributed unevenly, and the stratum corneum will be deformed.
Horseshoe - photo
The lower surface is also horizontal, but not solid: at the outer edge there is a longitudinal recess, which is called a nail track. Thanks to this path, the heads of the nails with which the horseshoe is nailed do not protrude outward, which means they are less susceptible to abrasion. Nails are not hammered into the toe and heel areas, so there are no recesses there.
Every horseshoe has nail holes
The thickness of the canvas for a medium-sized horseshoe is 8 mm, width – 22 mm. There are a total of 13 sizes of horse shoes, and each of them corresponds to certain parameters of the product: the size of the branches, the width between the heels and at the widest part, weight, thickness and other indicators. They go on sale in pairs, for the rear and front hooves.
Horseshoes for horse hooves
Wehrmacht horseshoes for draft carriage horses
The farrier sands and straightens the hoof using a rasp, where he nails down the shoe, the edges of the hoof, and especially the tip.
The hind legs are trimmed the same, although the shape of the hind leg is slightly different from the front.
Much more beautiful than before!
Nails: new and old. Nails are used only once and cannot be re-attached.
Anvil.
A toolbox that didn't fit in the pockets of his leather apron pants.
And here are the pockets. A decent blacksmith has a separate knife for his right and left hands.
Assembling a standard horseshoe.
The farrier knows the size of each horse's hooves, which he forges more than once, but still each horseshoe must be manually adjusted to the shape of the hoof.
The nails are nailed like this: the first one at the tip (the front of the hoof), the second one on the other side, then again at the first one, then again at the second one.
Scary look: claws sticking out of the hoof. But it doesn't hurt because the hoof is so exposed at this point that there is no pain - although the hoof is alive in this place, it does not feel as if a piece of a nail is being pierced in a place where it is not attached to the tip.
The nails are curved on the outside.
So far this is the point of view.
The tip of the horseshoe is attached to the hoof with a hammer. Not all horseshoes have such a petal. Horseshoes for the hind legs have two of these petals, one on each side of the hoof.
The main part of the forging is done.
Now a special riser is used, a kind of large iron pin on which the blacksmith places the horse's leg. For the front leg, the pin is placed in front of the crotch, and for the back leg, it is located slightly to the side of the abdomen. Surprisingly, the horses stand very calmly on this pin; some take pleasure in chewing or licking the blacksmith's sweaty clothes or licking his hair.
The ends of the nails are removed with a special tool.
Now they do not protrude; they were “crushed” at the base with special semicircular pliers.
The rasp is used to compare the edges of the hoof and the horseshoe.
The modern blacksmith has a small mobile forge with many tools. And in the first aid kit there is a light drug for those who are especially cruel, who are afraid, do not like or cannot stand still during forging.
Horseshoes are required for police patrol horses with spikes. A blacksmith makes holes for spikes in a horseshoe.
And threads into the holes.
Then screw in the plugs.
A ready-made horseshoe, in which it is not dangerous to walk along the stone streets of an ancient European city.
All that remains is to nail him to the horse. You will also have to forge on all four legs.
And this is a horseshoe for a horse, which protected him from exacerbations after old injuries, did not allow “chips”, a small piece of bone broken after an injury, to move. There are ready-made orthopedic horseshoes, but they were made by the blacksmith himself, welding part of one horseshoe to another.
The state standard for “Horseshoes” (GOST 54/08-77) is a document that defines the quality, size, rules for receiving and packaging horseshoes. Standard horseshoes are made of steel of a certain grade, profile and quality. The quality of this steel allows you to change the contour of the horseshoe without preheating it, that is, cold adaptation of the horseshoe.
In its finished form, the horseshoe is a curved plate in the shape of the plantar edge of the horny capsule of the hoof. On a horseshoe there are: 1) two branches - outer and inner 2) two surfaces - upper and lower 3) two edges (side surfaces) - outer and inner 4) nail marks, 5) holes for nails 6) lapel.
In addition, the horseshoe is divided into parts corresponding to the division of the wall: 1) front, or hook 2) side (side 3) back or heel.
The upper surface of the horseshoe consists of two parts: outer and inner. The slightly larger outer part supports the plantar edge of the corneal wall, the linea alba, and the edge of the sole of the foot. This surface must be perfectly smooth and level; the branches of the horseshoe should lie in the same plane. Irregularities and bevels of the upper surface outward or inward cause slow adaptation of the horseshoe and uneven distribution of body weight on the hoof.
The inside of the top surface gradually smoothes out toward the inside edge of the horseshoe and is called a helix. The depth of the coil on the side of the inner edge should be 1/3 of the thickness of the horseshoe and end at a distance of 30-40 mm from the ends of the branches. Currently, horseshoes are made without a coil, with a flat horizontal top surface
The bottom of the horseshoe is horizontal. There is a notch along the outer edge - a trace of nails: on the side of this surface the horseshoe is worn away, especially in its hooked part.
Sometimes a bevel is made on the bottom surface of the horseshoe towards its inner edge (counter bevel). The presence of a headwind helps to throw away small stones, prevents dirt and wet snow from sticking to the plantar surface of the hoof, provides greater strength to the limbs and protects horses to some extent from hammer blows.
The edges (lateral surfaces) of the horseshoe (especially the outer one on the side of the adjacent limb) must be smooth, uniform, without protrusions to avoid traumatic damage.
The horseshoe cuff is a thin semicircular plate, 1.5 cm high and 2 cm wide, stretched in front of the outer edge of the tip of the horseshoe. It somehow protects the toe wall from damage, makes it easier to put on the shoe, and prevents it from moving backward as the horse moves.
The thickness of the horseshoe-shaped branches should be equal to the thickness of the horny wall. The width of the horseshoe branches should correspond to twice the width of the plantar edge of the corneal wall along with the linea alba.
The nail mark breaks through the outer edge of the lower surface of the horseshoe at 0.5-0.75 of its thickness; the heads of horseshoe-shaped nails are placed in it, which must be tightly wedged. In this regard, the shape of the lath must exactly match the shape of the head of the horseshoe nail. Horseshoe nails are not driven into the toe and heel parts of the horseshoe, and no marks are left in these places.
Nail holes are an important part of the horseshoe, so special attention should be paid to their location, size and shape. Improperly drilled nail holes can cause damage to the tissues located beneath the corneal capsule during forging. This damage is called deformation.
The forefoot and hindfoot have different shapes due to the different contours of the plantar edge of the hooves. In the front shoe, the widest part of the curve is located in the middle of the branches, in the rear shoe - at the border of their middle and rear thirds. Because the plantar edge of the outer half of the hoof is more rounded and the inner half is straighter, the outer edge of the horseshoe is more rounded than the inner. The latter characteristic also determines the shape of the horseshoe for the right and left hooves.
But the factories do not produce special horseshoes for the right and left hooves. Thus, during the horseshoeing process, each horseshoe is given the appropriate shape.
According to the size of the hooves, horseshoes are produced in 13 sizes: No. 0, no. 00, no. 1, issue 2, no. 3, no. 4, no. 5, no. 6, no. 7, no. 8. On the top surface of the horseshoe is placed the number of the horseshoe, the sign for which it is intended (“P” - front, “3” - back.
For very small hooves, horseshoes No. 0 and No. 00 are selected, for small ones - No. 1 and No. 2, for medium ones - No. 2, No. 2.5, No. 3, for large ones - the remaining numbers.
Horseshoeing process
There is an opinion that the process of horseshoeing is a painful procedure in which the animal experiences terrible agony. But this is absolutely not true. Even though impressively sized nails are used to shoe horses, they are inserted exclusively into insensitive areas of the hoof. At the same time, the animal does not feel anything and all that can scare it is a loud sound or sudden movement.
Before proceeding directly to the process itself, the hoof must be thoroughly cleaned and processed. Since under the horseshoe, there should be no remnants of dead tissue of the horny body.
If the old horseshoe is in good condition, it can be re-adjusted to the desired size and shape.
A farrier who works with horses bears great responsibility for their health. Therefore, he must have a good understanding of the anatomy and physiology of the animal.
An experienced farrier must be able to properly clean hooves, select sizes and materials for making horseshoes.
It is best to carry out the shoeing procedure at home, in a familiar environment for the animal. Thus, making the stressful situation minimal.
To do this, in the farm yard, you need to find a quiet and clean place where the blacksmith can shoe the horse using special tools.
What tools will you need?
To nail horseshoes, you need the following tools:
- special pliers;
- hook;
- rasp with two types of notches;
- pruning;
- knife with a curved end (hoofed);
- hammer;
- key.
Forging tools
Forging tool set
Toolbox
The horseshoe is fastened with special nails - nails, which differ in the shape of the head and pin. Ukhnali are produced in lengths from 45 to 70 mm, and according to GOST they are divided into six sizes. They are used only once and are not suitable for repeated use. Additionally, during the work process you may need a forging machine - it is used in cases where the animal is excessively timid or impatient.
Uhnali for forging
Sports
Horseshoes designed for performance horses are both more durable and made from lighter metals. Different sports have their own types of horse shoes.
For racehorses, horseshoes are made light; their weight should not exceed 120 grams. They are made from durable spring steel. If the races are on a slippery track, then the horseshoe should have a trapezoidal cross-section.
For all-around competitions, carbon horseshoes with a 10 mm edge on the bottom surface are used. For winter competitions, horseshoes are round, weighing 180-200 grams, with three spikes. Also, Berezovets horseshoes are suitable for all-around events - horseshoes without spikes, with special thickenings.
Carbon for all-around
Racing horses are shoed based on the type of ground the horse will run on. These can be either weighted Berezovets horseshoes or standard horseshoes weighing 300 grams.
Dressage horses are usually not shod, but simply have their hooves cleaned on time. If necessary, you can shoe the forelimbs on light, smooth horseshoes.
For equestrian games, it is better to opt for coal horseshoes with low sides. In this sport it is prohibited to use horseshoes with spikes to avoid various injuries.
In winter, to participate in winter sports, horses are shod on coal horseshoes with special teeth along the outer side. A special feature of winter horseshoes is the presence of a thin metal bottom to prevent snow from sticking to the hoof.
Easy option
These were the main types of horseshoes. If the animal is sick, for example, the horse has the flu or is injured, orthopedic horseshoes will be indispensable. Such horseshoes can reduce discomfort and pain when walking, speed up the healing process, correct hoof deformation, and even out the horse’s movement.
In each individual case, different horse shoes are used. For example, if there is a mid-crack in the hoof, choose a round-shaped horseshoe with side flaps and toe spikes. When the base of the hoof skin is inflamed, a round horseshoe with a cutout at the level of inflammation is used. In any case, such horseshoes should be selected by a veterinarian.
https://pets2.me/bok/1920-podkovy-dlya-loshadey-naznachenie-vidy-pravila-podkovki.html
Learning to shoe an animal
Interesting! Many people think that horses hurt when they are shoed, but this is not true. Metal nails are driven into the stratum corneum and into a completely insensitive area. Therefore, the animal does not feel any discomfort.
Blacksmith Basics
The work of a blacksmith requires great skill and precision. He must be able to trim hooves, file them, determine the size of a horseshoe with great accuracy, and forget nails correctly. Just one mistake and the horse can start limping. Moreover, every farrier must have knowledge of the anatomy of the horse's limbs. Very often we have to solve serious problems and correct them with the help of horseshoes.
Today, a farrier can be found in any equestrian club and in any stable. Also, many craftsmen are engaged in private work with home visits. First of all, he must have special tools, without which the work will be impossible. See diagram and video. In large equestrian complexes, horses are shoed in specially designated areas near the machine. At home, you will need to find a dry, well-lit and quiet place.
Before you start shoeing a horse, the hooves should be washed and cleaned of dirt with a special hook. Only after this can the animal be brought to the pen. Most horses stand quietly, but there should be no other horses or food near her. For aggressive and excited horses, a special machine with a leash is used.
- In order to install a new horseshoe, you must first remove the old one. To do this, the blacksmith takes the correct position: as if he is straddling the horse’s hind leg or bending the front leg, as in the video.
- Using pliers, you need to grab the wings of the nails and pull them out. Then the horseshoe is removed.
- Now you can proceed to the cosmetic part. It is necessary to remove all excess stratum corneum on the hoof using edge trimming nippers, as shown in the video.
- After this, take a hoof knife and remove all excess inside: calluses and the cornea of the sole. Be careful not to touch soft tissue.
- The hoof wall is trimmed with a cleaver.
- We take a rasp and thoroughly smooth out all the unevenness, as if sanding the inside. This is clearly visible in the video.
- Now we take a horseshoe, split it until it is red and apply each one to our hoof. Thus, the platinum leaves a mark on the stratum corneum, along which the fitting takes place. This is how you can check whether the horseshoe matches the width and length of the hoof.
- If there are any extra parts or protrusions after fitting, they are cleaned off and trimmed.
- Now we move on to “re-shoeing” the hooves. We place a fold or rubber layer under the horseshoe, take the necessary nails and nail the plate to the stratum corneum. The protruding ends of the nails behind the top layer of the hoof are bitten off with pliers.
- If necessary, the last thing to do is screw the spikes into the special holes.
After shoeing, you definitely need to look at how the horse moves, whether it is limping and whether it steps evenly on all four legs. Only after this the shoeing process can be considered complete. Watch the video for more details.
In this video you will see the entire process of shoeing horses. All the stages that every blacksmith goes through will be experienced by the presenter of the program.