Each bee package contains a full-fledged bee colony, which has all the resources for harvesting in the first season. Planting bees in a hive must be carried out according to certain rules, taking into account its type - cellular or non-cellular. Be sure to properly prepare for the process and provide proper care for the bees in the future.
What is a bee package?
A bee package is a small part of a healthy young colony prepared for sale, transplanted into a special box for comfortable transportation. Package contains:
- 2 Dadan (large) frames with brood;
- 1.5 kg of bees;
- young uterus up to 2 years;
- feed (about 3 kg).
Most often, a bee package consists of 4-5 frames: the buyer personally agrees on the quantity and content with the seller. Also, after pre-ordering, the beekeeper personally examines the family, food and queen he wishes to purchase.
During the inspection, factors such as:
- the presence of dead insects (there should not be more than 20 dead insects);
- presence of a young uterus;
- absence of diseases: insects must be active (without enlargement of the abdomen and uncharacteristic trembling of the wings), there should be no foreign formations observed on them; printed brood is not covered with white, brown or black coating.
After such an inspection, we can talk about a healthy package, which will soon grow into a full-fledged bee colony.
Advantages of cellless packages
There are bee packages that do not contain honeycombs. They have the following advantages:
- the costs of treating diseases in bees, as well as their prevention, are minimized;
- transportation is much cheaper and more convenient than that of a honeycomb bee package;
- the farm is easily updated;
- insect care costs are reduced;
- you can easily track the quality of the bee colony and queen, which is important for further use.
Why is it necessary to transplant a bee package into a new hive?
Purchasing and transplanting insects in bags is beneficial due to its low cost, in contrast to purchasing a full-fledged family. In a fairly short period of time, a package of 4 frames grows into a standard family and works just as well.
Reasons for replanting a bee package:
- Apiary growth.
- If diseases are detected in the apiary , it is necessary to remove deadstock, destroy existing bees and disinfect the affected hives. If this is not done, the disease can spread to healthy families. After this procedure, a new package is transplanted into the treated hive.
- An active colony is constantly growing and at some point it runs out of space in its hive. If urgent measures are not taken to add frames, buildings, or split the colony, part of the hive may “ collaps ” (fly away in search of a new “home”). If the swarm with the queen does come out, a new package with a young bee will come to the rescue.
Characteristic
Experienced beekeepers have long ago come to the conclusion that not every hive meets the needs of bees. These insects prefer to build high honeycombs and move freely along them. The queens are engaged in intensive egg laying throughout the season. The structure of a narrow-tall hive resembles a tree hollow; there is some similarity with the usual Dadan hives, but it is adapted specifically for a narrow-tall frame.
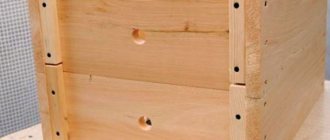
The Moiseev hive consists of magazine extensions, and the removable bottom has an enlarged subframe space, and the lower and upper entrances are cone-shaped. At the same time, the upper taphole is made in the shape of a circle, and the lower one has a slot-like shape. The half-frames are perpendicular to the narrow high frames on the body, which makes it possible to create a natural habitat for insects.
Preparing for transplant
Before transplanting a new bee into the hive, it must be treated: cleaned, washed, dried, disinfected, heated the inside with a blowtorch and covered with a broom of herbs (motherwort, mint). It should be taken into account that the presence of foreign odors (if not properly treated) can lead to the family leaving the “new home”.
The next stage is the placement of the hives in their permanent place, the location of drinking bowls and feeding. Corn flour mixed with ground red pepper and dry ground mustard can be used as feed.
After transportation, the package that arrives at your destination should be left in a cool, dark place for 2-3 hours - this will make the transfer easier. Also, before transplanting the bee package into the hive, you need to check it for the presence of death. Tired insects after transportation are fed with sugar syrup, spraying it on the frames (you can also pour the syrup into a small plastic bag, approximately 50 ml, moisten it in the same syrup, and place it on top of the frames). The syrup is prepared at the rate of 1.5 kg of sugar per 1 liter. water. The liquid should be warm.
Preparing the hive
Ways to combat wax moths
How to deal with wax moths when a pest appears?
There are a lot of different methods that can be divided into three main groups: biological, chemical, mechanical. The choice of the most suitable one is carried out by determining the degree of infection, the number of honeycombs affected by the moth, and a number of other factors.
It should be noted that bees are quite capable of independently protecting the hive from pest invasion and damage. When the caterpillars penetrate, the insects literally seal the larva, which leads to the death of the latter. It is for this reason that it is extremely important to provide the bees with access to all the nooks and crannies of the hive. However, it is important to remember that bees can only cope with a small number of parasites.
Biological method
So how do you get rid of wax moths in your hive? Beekeepers do not recommend using chemicals to neutralize pests when the number of pests is small. To prevent the appearance of moths, when a small number of pests appear, you can use biological methods, that is, involving the use of products of natural origin.
The leaves of immortelle, mint, and walnut perfectly repel parasites. To eliminate wax moths and prevent their appearance, you need to carefully pour frames prepared for long-term storage.
An excellent remedy for parasites is mint tincture. To kill insects, just mix it with a small amount of water, then pour it between the frames and place it for a day to dry. This product is not harmful to bees. As a rule, the use of these products causes butterflies to settle further away from the treated areas.
Mechanical method
But what to do if moths appear in the hives, but the use of biological and chemical agents is not possible for a number of reasons? In such a situation, it is sufficient to use a mechanical method, which involves shaking the larvae out of the frames manually. In order for the pests to leave the shelter, it is enough to lightly knock on the frame and then shake out the insects.
Available and special chemicals
Before fighting wax moths, it is recommended to carefully study the methods, methods, and means that will help you do this quickly, effectively, and safely for bees. It is best, of course, to use organic means, but with a severe degree of infection, the use of tablets and chemicals may be required.
Salt treatment
The fight against wax moths includes mandatory processing of frames immediately before sending them to the honeycomb storage facility. The easiest way is to use a saturated solution of common salt. After preparing such a product, it is enough to pour the resulting concentrate into a spray bottle, and then carefully treat the potential affected areas. After drying, a white layer forms on the frames, which has a repellent effect on wax moths. This measure will help to effectively protect the dry body from the invasion of moths.
Fumigation
In case of severe damage, you can get rid of parasites on the frames by using ordinary sulfur dioxide. To destroy the parasite, it is necessary to fumigate the frames twice over three weeks at regular intervals; this, of course, should be done before sending the honeycombs to dry. When thinking about how to remove wax moths from a hive, one should not forget about the benefits of these caterpillars. If there are enough parasites, it is quite possible to prepare a useful tincture based on them.
Freezing and heating
As with any other pest, control methods aimed at destroying wax moths include exposure to high or low temperatures. You should know that wax moths die at temperatures below ten degrees.
In order to get rid of parasites, you can take the frames outside in the winter or place them in the refrigerator. To eliminate the possibility of parasite survival, it is recommended to carry out the procedure for at least two hours. Heat treatment involves the use of high temperatures of over fifty degrees.
Vapors of acetic or formic acid
The easiest way to protect honeycombs from wax moths is to treat the frames with formic or acetic acid.
To remove fireflies, simply place a small container with the selected product at the bottom of the box, then cover it on top with a thin layer of polyethylene. It is recommended to periodically check the amount of product, replenishing it if necessary.
Traditional methods
To get rid of wax moths in hives, it is recommended to use various traditional methods. Knowing what parasites are afraid of, you can quickly achieve good results. For example, to prevent females from leaving clutches of eggs, it is recommended to leave several containers on the site, at the bottom of which pour water mixed with sugar and honey. Despite the fact that adult butterflies do not need food, they fly to a pleasant smell.
Ordinary naphthalene will help get rid of parasites. The given substance should be placed directly in the hives using small boxes. To prevent a number of unpleasant consequences, it is recommended to remove these boxes during the main honey collection period.
To remove pests, you can use scented sachet-type pads. To make them, you need to sew gauze into a pillow shape, pre-folded in several layers. Next, you need to place in these improvised pillows any plant that has a distinct specific smell, for example, mint, wormwood, geranium. Place the bags in the room where the dry goods are stored.
To quickly remove parasites, it is recommended to treat hives or honeycomb storage rooms with smoke. In order to obtain it for subsequent fumigation of infected honeycombs, it is necessary to set fire to combustible sulfur.
It is important to use this method with some caution.
It should be noted that if honeycombs are heavily infested, the use of traditional methods may not be effective. To remove large numbers of wax moth larvae, it may be necessary to use strong insecticides.
Contents of the bee package before transplantation
According to GOST, the bee bag must contain large Dadan frames in the amount of 4 to 6 pieces. A package for 4 frames consists of 2 outer frames with food and 2 inner ones with printed brood, a young queen. Her age is important as this will determine her seeding activity as a healthy worker bee. The acquisition of an old queen threatens that she will sow more drones, and the possibility of swarming is also high.
The age of the uterus is determined by a special mark that sellers put according to GOST:
| Mark color | Year of hatching | |
| White | 2011 | 2016 |
| Yellow | 2012 | 2017 |
| Red | 2013 | 2018 |
| Green | 2014 | 2019 |
| Blue | 2015 | 2020 |
Prevention
Preventing the appearance of moths is a feasible task. To do this, follow the following recommendations:
- always keep the hives completely clean;
- In autumn and spring, carry out preventive disinsection using drugs or folk remedies;
- store frames correctly, observing all previously described conditions;
- correct any problems in a timely manner, eliminate breakdowns in the apiary;
- keep the wax in a closed container, and if possible, recycle it immediately;
- Keep reserve cells sealed or wrapped in plastic.
If you notice that wax moths have already begun to fill the dry land, immediately take measures to destroy it. Don’t expect it to disappear on its own: it will not only damage the honeycombs, but will also lead to damage to the beekeeping products that end up there.
Conditions of transportation
When transporting bee packages, it is better to choose a road with a high-quality surface, so as not to shake the insects and destroy the honeycombs. In the car, the boxes are arranged in longitudinal rows with sufficient distance between them for high-quality ventilation.
The frames in the box are secured with special slats (or combs) to prevent their vibration. Otherwise, many bees may die. Feed frames should not be taken too full as the honeycombs may come off when moving.
If transportation is carried out in a trailer, the package must be hidden at least half in the back.
Families can be transported day or night. If the weather is hot, the car should be placed in the shade while resting. If the journey is long, the bees need to be allowed to rest for 1 day so that they can collect water and make a cleansing flight.
It is important to take into account that during a long journey a young bee may appear, so it must be provided with food (before leaving, stock up on additional honey). Bee packages need to be watered at least once every 2 days.
You can check the condition of the bees by listening to the boxes. If the hum is smooth and calm, it means the transportation is going well.
Top dressing
As a rule, when the weather is warm, insects do an excellent job of finding food. But even in this case, it is recommended to provide them with food. If the temperature is low, it is imperative to think about the issue of feeding.
Sugar syrup is used to strengthen the family. You can also give them food based on beebread. In the absence of beebread, pollen or substitutes are used. Bees are often fed this mixture: honey, sugar, yeast, flour, milk, acetic acid, water. The mass is stirred until smooth, distributed over the upper bars in the form of small cakes. Place plastic wrap on top of the feed.
Kinds
In practice, beekeepers use two types of bee packages:
- cellular (frame);
- honeycomb (frameless).
The cellular package is formed from standard Dadan frames in a 3+1 ratio. There may be a larger amount of feed if long-term transportation is expected. The filling of the package in most cases depends on the wishes of the buyer.
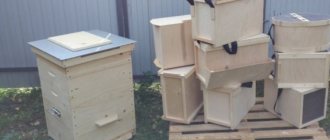
A honeycomb-free package is a box whose top, bottom and narrow sides are made of wood. The two wide side walls are mesh. In such a mesh box a queen bee is placed in a special cage with feeding (syrup, candy), 1.2 kg of bees, a feeder and a drinker.
Transplanting four frame bags into a hive on video:
Specifications
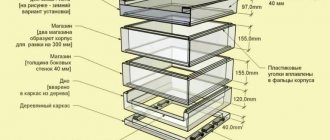
The narrow-high design, like its numerous analogues, consists of several standard elements: a roof, a bottom, a nested and inserted moving frame, and a ceiling. Let us consider the structure of each of these elements in more detail.
The roof on a narrow, high hive is flat; it fits over the body and consists of a box, insulating material, a feeder and a roof. To make boxes by hand, you need boards 60 mm high and 20 mm thick. The thickness of the board shield should be 15 mm. It is recommended to use galvanized iron for roofing equipment. The feeder should be placed on the side; if necessary, it can be removed and insulation placed on it.
To properly equip the bottom, a 10 mm thick birch plywood sheet should be placed on top, and a 20 mm pine board should be placed on the bottom. The layers must be clamped with 2 bars and secured with nails. Plywood is of great importance here, as it can greatly simplify the use of the system and prevent the appearance of cracks. A barrier for the tap hole and a bushing must be placed on the front of the bottom, and a metal ventilation grill on the back. With its help, the nest will be regularly ventilated in winter, and protected from the heat in summer.
To equip the nesting frame, you must use pine planks. The top beam should have dimensions of 18x25 mm, on the side one you need to install delimiters with a volume of 37x11 mm. A beam measuring 8x20 mm is installed in the lower part. The frame should be set with a height of 150 mm; Ruta will also fit on the magazine. In order for insects to be able to move freely around the frame, small cuts should be made on top of the foundation at an angle of 45°.
It is recommended to place 15 mm thick rubber under the insert moving frame; it can be obtained from outdated bicycle inner tubes. The rubber strips must be firmly secured to the walls of the hive. The thickness of the walls per frame should be 30 mm.
There is no such thing as a ceiling in a narrow hive.
Detailed information about the technical characteristics of the design in the following video:
VIDEO
Transplanting a bee package
Features of transplanting a colony from a bee package depend on its type.
Transplanting honeycomb bee packages into hives:
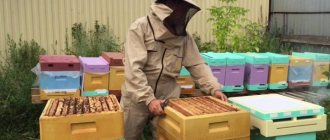
- For safety, the beekeeper wears a suit, gloves and a face net to avoid being bitten.
- The smoker is being prepared.
- A feeding frame is placed into the hive from the edge, followed by a waxed frame.
- The box with the bees is placed near the hive into which they will be transplanted so that the entrances point in one direction.
- The entrance to the box is opened so that the bees can fly around.
- When the worker bee flies out of the box, the beekeeper rearranges the frames into the prepared, heated hive, maintaining the sequence of frames, as during transportation.
- The bee remaining on the walls of the box should be swept into the hive.
- The queen is transplanted after the rest of the bees have settled down a bit.
You can also use the no-fly method. The bee package is installed behind the hive, narrowing the entrance to 2 individuals. The frames are immediately rearranged into the hive, maintaining the sequence of the frames. In this case, the uterus is left in the cage, with the lid slightly open. The hole is sealed with wax and pierced in 3-4 places. The bees themselves will release the queen bee from the cage.
Before transplanting bees from a bee package into a hive using the honeycomb-free method, you need to:
- For a standard bee package you will need 4-5 Dadan frames with foundation (2 outer feed frames, central ones - drying, foundation). Limit by aperture.
- Before “relocating”, the box with bees is placed in a cool, dry place so that the insects create a club.
- When transplanting, the lid of the bag is removed and it (open) is installed in the hive between the frames.
- The uterus, which was in the box, should be slightly opened (but not completely) and placed in the center between the frames. Release the insect the next day.
- If the queen was among other bees, and there is no room for a bee bag box, the insects can simply be shaken out into the hive.
- If bees show aggression, you need to use a smoker, it will calm the family down.
Causes of hive damage
There are several main reasons for the appearance of pests in storage facilities and hives. Especially often, parasites infect old hives that have a large number of cracks and gaps in which female wax moths can lay eggs without hindrance. Insects are also attracted by the lack of necessary cleanliness. The presence of wax or other bee products at the bottom of the hive can be considered by wax moth larvae as an invitation card.
The larvae can move quite freely between hives. It is this ability that simply explains such a high level of prevalence of parasites. The absence of protective grooves between bee houses and plants that insects are afraid of leads to the rapid spread of wax moths.
Common mistakes and how to avoid them
When transplanting a bee, you need to carefully follow all the points and avoid common mistakes:
- Waxed frames must be present in the hive , since ready-made honeycombs will reduce the speed of nest construction.
- It is a serious mistake to transplant insects in hot weather . In this case, it is better to move the bees in the evening. In cool weather, time does not matter. The ideal procedure is spring or autumn.
- The expansion of the bee package is carried out only after 1 month . To achieve this, waxed frames are added. In their absence, the family is at risk of swarming.
- After opening and replanting the package, you need to collect the dead meat and submit it to a veterinary laboratory, where the beekeeper will receive a qualified analysis of the bees, in order to avoid infection with various diseases.
- In the cool season, all manipulations with the frames should be very fast so as not to overcool the bees.
Proper transportation and proper transplantation of the bee package into the hive (depending on the types of packages) is the key to the rapid growth of bees. Further feeding, expansion and regular inspection of colonies will help ensure a sufficient supply of marketable honey.
Features of work
Beekeepers like to work with this hive, because in it the insects survive the winter well, maintaining the integrity of their bee colonies, they have good protection from the cold, and are able to eat regularly and fully without losing their club. For this reason, the system is very popular in northern regions, which have harsh winters.
Since the design is quite compact and light in weight, the frames in it can be moved without any problems, because they are also not too large.
This type of hive can also be used by beekeepers without work experience, as it is very easy to operate, and pumping out honey is also not difficult. Nectar leaves the frame quite well. The system is perfect for small apiaries; narrow high hives are not suitable for large-scale farming.
Assessment of the quality and quantity of the queen bee seeding
The quality of the queen is assessed by how complete the brood appears. It is easier to demonstrate this clearly on a sealed one. Smooth, without gaps, without inclusions of drones is welcome. The presence exclusively of the latter (in common parlance - “humpbacked”), scattered throughout the cell, is a sign of the absence of a uterus. Sometimes novice beekeepers confuse this picture with the beginning of sowing of some young queens, who have a similar situation in a tiny area, with the beginnings of their important activity.
It is when carrying out spring work in the apiary that you should take care of clean, light brown honeycombs suitable for egg laying. In the spring, light dry conditions, in which not a single generation has been bred, are completely unsuitable for this. Some of the pioneers of the entertainment industry make this mistake - they try to find the queen at all costs. She, on the contrary, uses all available means, being in terrible fright, to try to hide. Confrontation is unwise. So it’s not far from artificially freezing open brood. Carry out the stages during the not-so-warm period as quickly as possible, without delays or procrastination. Discard combs that are worn out, have many drone cells, are damaged by rodents, are covered with mold, are dirty, are black.
Do-it-yourself flight barrier
Beekeeping - Do-it-yourself summer fence
Do-it-yourself entrance barrier - Beekeeping
To adjust the opening of the entrance, you need to use a entrance barrier. Most often it is used only for one specific hive and bee nest. If a beekeeper is engaged in ground-based beekeeping, you can easily use various self-designed devices. When beekeeping is in pavilions, it is difficult to make devices; you need to take everything into account, having first developed a specific plan for yourself.
Making a taphole barrier with your own hands
You can approach the design in different ways; each beekeeper selects his own size of the entrance barrier for the hives. To do this, you need to drill a hole in the valve; it should have a diameter of up to 4 mm. So, when the hives are moved, transported, they will receive a sufficient amount of oxygen, and the bees will breathe easily. Such devices are especially effective for hives when the fields are treated with toxic chemicals.
For the design you will need galvanized plates, the dimensions are: length up to 250 mm, thickness - 1 mm. The width should match a standard tap hole valve plate.
Once the valve is ready, it must be changed in the evening to prevent theft and not disturb the bees. For the winter, you can install a reversible type of valves, which you can also do yourself; for this you need to have exact dimensions so that everything can be accurately calculated.
In the diagram you can see a fully assembled taphole barrier.
Making a taphole barrier with your own hands
You can approach the design in different ways; each beekeeper selects his own size of the entrance barrier for the hives. To do this, you need to drill a hole in the valve; it should have a diameter of up to 4 mm. So, when the hives are moved, transported, they will receive a sufficient amount of oxygen, and the bees will breathe easily. Such devices are especially effective for hives when the fields are treated with toxic chemicals.
For the design you will need galvanized plates, the dimensions are: length up to 250 mm, thickness - 1 mm. The width should match a standard tap hole valve plate.
Which type to choose
The first thing you should consider when choosing a device is the type of entrance in your hive. It is quite logical that if you have a slot-shaped type, you need to use a rectangular, classic model. Well, for a round hole - select a round one.
In addition, it is necessary to take into account its size. It should cover it tightly and completely, which does not always happen when using homemade bee houses with non-standard holes.
It is recommended to measure the outlet diameter before purchasing and compare it with the offered options. This will allow you to more accurately determine the right size.
If a person is just starting out in beekeeping and is going to immediately purchase everything he needs, it is better to choose a hive with a round entrance and the corresponding type of barrier structure. There is not much difference for bees, but it is somewhat easier to work with this design model, which is important for beginners.
Manufacturing technology
In beekeeping, several technologies are used to make the barrier. Beekeepers choose the appropriate sizes for the future hive entrance structure. It is necessary to drill a small hole in the valve. The diameter of the hole should not exceed 4 millimeters. In this way, safe transportation of the hive can be ensured. In the process of moving the hives, the bees will receive a sufficient amount of air. Such devices are the most effective for hives at a time when fields are being treated with chemicals and poisons. You will need galvanized plates having the following dimensions:
- thickness – 1 millimeter;
- length – no more than 250 millimeters.
Varieties of narrow-tall hives
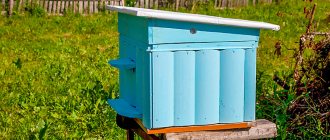
There are several varieties of bee houses, repeating the originality of a hollow in their shape. Let's talk about two of them.
Important! The honey extractor for narrow high hives needs to be redesigned, since their frames are wider than those of standard hives. The MP honey extractor with two adjustable reversible cassettes is well suited for these purposes.
8-frame
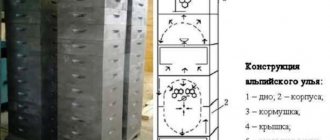
Alpine hive. The height of the frame is 21.5 cm, with internal dimensions of 30 × 30 cm and a frame of 29.1 × 20.2 cm (8 frames fit in the case). The author and inventor is the Frenchman Roger Delon, a beekeeper who alone on the mountainous Alpine slopes maintained a beekeeping farm for a thousand hives, so he invented a lightweight and easy-to-use hive. The indicated dimensions of the hive correspond to the natural dimensions of a bee’s habitat in a tree hollow. At the same time, the family expands upward (with the addition of additional buildings). At the main bribe, up to six buildings are installed. There is no entrance in the described hive.
Instead, there is a 7 mm slot, which is obtained if the lower housing is installed on a separate bottom. There are no upper entrances either. The air exchange process is carried out in the same way as in a tree hollow: air enters through the slot, then it is pulled upward, connecting with carbon dioxide and water vapor, which the bees exhale, and then falls down. A feeder is installed on the top of the hive (its size is identical to the transverse size of the hive, with a ceiling of 3 cm), which protects the bees from hot air and the formation of condensation at the top. The Alpine configuration has especially taken root in the northern Russian expanses.
12-frame
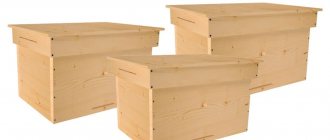
Dadan-Blatt hive . This is a multi-body 12-frame hive, equipped with two bodies per 30 cm frame. The creator is the American beekeeper Charles Dadan. Then the Swiss Blatt began modernizing such a hive. The design of the bee house in question is simple, which makes it possible to create conditions close to natural in it for the development of a bee colony. There are 2 cases of 12 frames each (total 24 frames 43.5 × 30.0 cm).
Did you know? Japanese honey bees know how to defend themselves from hornets by killing them with the increased temperature of their bodies: immediately after the enemy enters the hive, the bees lure him into the nest, after which they cover him with their bodies, forming a huge vibrating ball. In 20 minutes the temperature of the ball rises to +47, which is destructive for hornets.
°
C.
This design allows you to quickly grow a large amount of brood by the time the honey is collected. The risk of swarming is also reduced and honey collection increases by up to 50%. What is also important is that the wintering of the bee colony improves. The described hive is very popular among beekeepers, especially among those who maintain large and medium-sized apiaries.
Technology for constructing a taphole barrier with your own hands
To adjust the taphole clearance, you need to use a taphole barrier. Most often it is used only for one specific hive and bee nest. If a beekeeper is engaged in ground-based beekeeping, you can easily use various self-designed devices. When beekeeping is in pavilions, it is difficult to make devices; you need to take everything into account, having first developed a specific plan for yourself.
Letkovy barrier on the hive
Spring assessment of the quality and condition of the bee colony after wintering
Initially, an experienced specialist is able to assess the strength of the family by flying around. You can gain invaluable experience as a result of many years of painstaking observations with the ability to keep brief but succinct journal entries. This takes many years. Textbooks recommend the following initial criteria in this regard.
Often in the spring, when working on the apiary in the hives, you have to completely dismantle the nests, quickly checking the condition of the brood, the amount of honey, bee bread, the quality and quantity of the honeycombs being hatched. Movements must be confident and smooth. Transplantation into “clean” hives is carried out without excessive noise or knocking. The strength of a family is determined by the number of fully occupied streets. A strong family is considered to have 8-9 streets or more. Weak families usually try to strengthen them at the expense of the strong ones. This technique is called family alignment. It is remarkable in that subsequently all apiary operations are carried out simultaneously on bee colonies of approximately equal strength. Maintenance is simplified. It's easier to plan for the upcoming weekdays.

