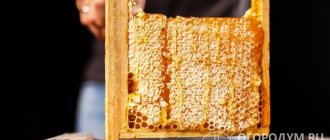
The electric drive for the honey extractor is used in apiaries for the production of commercial honey. Operating conditions are stationary or field. The device performs two functions.
The first - increases the volume of products received, increases production. The second one makes the process of pumping out the product easier, more mechanical, thanks to which the human factor is eliminated.
The honey extractor control unit provides direction to the motor. The speed of rotation of the motor and the time spent on this process depend on it. It also determines the minimum supply pressure.
Technology and features of manufacturing a honey extractor
To make an electric honey extractor, you will need a diagram and special drawings that will greatly facilitate the task. The beekeeper must take a barrel and make 2 holes at the bottom. Thanks to these holes, the honey will be drained. A wooden board is attached to the center of the barrel, which will serve as the basis for the future centrifuge. It is important to install it in such a way that it does not block the holes.
To do this you will need a good rotating element, such as parts from an old bicycle. Before connecting all components, it is necessary to prepare a U-shaped frame. This can be done using the edges of the barrel, as they will be able to support it reliably.
Next, holders for the honeycombs are designed. You can take a rectangular frame and then attach shelves from an old refrigerator to it. Fastening is carried out on different sides so that they are parallel. To make the frame move, the beekeeper attaches pedals that need to be rotated.
The result will be a high-quality and reliable electric honey extractor, made by yourself. The last step is to create an electric drive. It is important to remember that this homemade equipment is not suitable for a large apiary.
Electric drive diagram of a honey extractor with generator G-108
The electric motor is controlled using two blocks. The first block is an operation timer, based on the microwave oven remote control. The second block houses a pulse-width controller (PWM), with which the required motor speed is set:
I had to abandon the pulse-width controller that was shown in the video, since its board is slightly larger, as well as an additional display, which there was simply nowhere to place in my case. As a result, I used another PWM, more compact and with the same characteristics:
The original circuit of the factory pulse-width regulator looks like this:
The circuit is based on only one microcircuit. It controls three powerful field-effect transistors, thanks to which it is possible to control currents of up to 30 amperes. For normal operation of the honey extractor, this circuit had to be slightly modified. A soft start system for the electric drive was introduced, as well as an operation timer:
The need to use a soft start is due to the fact that without it, when starting the engine, a powerful surge of current occurs, which can reach 20 amperes. To avoid this, I implemented a soft start, which spins the honey extractor drum to the desired speed within 22 seconds: approximately 230 rpm. For this purpose, capacitor C4 and resistor R7 were introduced. Thanks to this, the starting current to the engine does not exceed 4 amperes. Capacitor C4 is switched from start mode to operating mode using a soft start timer:
This timer in this version provides a delay of 11 seconds. The time can be adjusted with a variable resistor. To extend the exposure time to the 22 seconds we need, we need to replace the electrolytic capacitor. The native capacitor has a capacity of 100 microfarads. It is enough to solder another one of the same value of 100 microfarads to this capacitor, and we will get 22 seconds of delay.
Also, two variable resistors with a nominal value of 100 KOhm R6 R8, controlled by a double switch S1 S2, were introduced into the circuit. Thanks to this, you can control the speed of rotation of the honey extractor drum by simply switching the toggle switch. This may be necessary when pumping out heavy frames in order, for example, to rotate on one side at a lower speed than on the other.
Device Features
First, let's figure out how the device works and what its features :
- The device operates from the mains. Therefore, when manufacturing and selecting suitable parts, pay attention to the length of the cord - it should suit the characteristics of your site.
- Any type and size of honey extractor can be equipped with an electric drive. That is, you can easily turn a manual model into an electronic one yourself.
- In addition, you can make an electric drive yourself or buy a ready-made version. If you have not worked with live devices before, then it is better to choose the second option.
In any case, making the honey extractor electric means improving it and simplifying your work.
We prepare the necessary tools and parts
The first step to production will be the selection of the necessary honey extractor elements and tools. Do not try to replace the recommended part with a spare part: this may result in the result not meeting your expectations, and in addition, the work process may become dangerous. For the most part, give preference to purchased new parts: this way you will be able to create a device that lasts. So, what do we need for manufacturing:
- You will need any tool with a rotary tip. The ideal option would be a drill or grinder.
- Hammer.
- Have at least 2 wrenches of different sizes ready.
Components of an electric drive for a honey extractor
You will also need different sized pliers. Buy several pulleys of different diameters. Elastic strap to ensure high-quality operation of the device. Depending on the size of your electric drive, you can use a belt from a washing machine: their electric drives with a honey extractor are quite similar. A mandatory and one of the rather difficult elements is a switch with a clock mechanism. Stock up on installation fasteners. Any type of DC generator to choose from: G108 or G21. High-quality work will be ensured by two files - round and triangular. Several electrical wires of different lengths. M8 type pin. Tension spring according to the dimensions of your electric drive.
Only after you have prepared all the tools and parts and are sure of their quality and safety, are you allowed to start directly working on manufacturing.
Design and principle of operation of a homemade honey extractor
The installation is made from various materials, but it works on the same principle - due to the centrifugal force provided by the drum. The honeycombs are printed out with a knife and placed in cassettes. When the device is turned on, the drum begins to rotate, a centrifugal force arises, under the influence of which honey flies to the walls of the device, flowing down them. There is a hole at the bottom through which the final product enters a special container.
Regardless of the design option, they are all designed the same and consist of an internal part and an external container for collecting the final product. Inside the honey extractor there is a drive that ensures its operation, a rotating rotor and frames where the cassettes are installed. The drive can be manual, foot, or electric.
The honey extractor can be made in two versions. The difference is the placement of frames. According to this principle, a distinction is made between chordial and radial structures. In the first case, the cassettes are fixed along the inner walls of the tank on chords of the circle. In the second case, the frames are radii of a circle and extend from the center as rays.
The number of frames in a honey extractor may vary. You should focus on the scale of the process. You can make a design for either 1-2 frames or several dozen (usually up to 48).
Varieties
There are 4 types of drives. Each of them has its own characteristics:
- A gear drive for a honey extractor is used to mechanize a procedure consisting of pumping out a sweet liquid. It can be replaced with a manual drive. Makes the beekeeper's work easier, while productivity increases. Power is supplied from batteries through a specific unit. The current of rotation is absolutely any.
- The worm drive for the honey extractor has touch control, the pumping process is completely mechanical, the body is made of aluminum. Power can be supplied from the mains or a battery. Provides the ability to perform different directions of rotation. The rotor produces speeds that can be adjusted.
- The belt drive is installed on all models that have a rotor shaft output through a crossbar. During prolonged use, the honey extractor control unit may overheat. Then a special emergency mode begins to turn on. It consists of a motor, a toothed belt, and the base is a sheet of steel three millimeters thick. All parts are mounted on ball bearings.
- The manual two-way rotation gearbox of the honey extractor is compatible with all types of models. The main role of the mechanism is to transmit the rotation of the handle to the axis of the product. Cassettes with special frames begin to move.
The need for a honey extractor in beekeeping
If there is only 1 hive with bees on your site, honey can be consumed immediately from the frames without the use of additional nodes. But if you have several bee families, you will need a good honey extractor. It resembles a centrifuge with a rotating drum and a fixed tank.
Inside the structure there are cassettes where frames are placed. When the drum handle rotates, honey flows out of the honeycomb. After pumping is completed, the frames retain their integrity, which allows them to be reused.
How to make an electric drive for a honey extractor
Making an electric honey extractor with your own hands is not a difficult process, and the main thing that may be useful to you is the presence of such personal qualities as attentiveness and determination. First of all, novice beekeepers are recommended to familiarize themselves with the technical characteristics of the operating units, shown in photographs abundantly posted on the Internet, and, based on their principle, recreate for themselves an electric honey extractor with their own hands.
There are few specific design features of the electric drive. To make a honey extractor yourself, you may need the most primitive tools and materials that almost any real owner has in the house:
- grinder and drill;
- a medium-sized barrel, the choice of material from which the barrel will be made is individual for each craftsman and depends on personal preferences;
- small wooden board;
- metal shelves from an old refrigerator;
- chisel;
- paint for metal.
Previously, when choosing the material from which the main container for a honey extractor would consist, many craftsmen chose wood, considering it more environmentally friendly and not capable of robbing honey of its basic taste qualities and beneficial microelements. However, modern beekeepers do not disdain more practical materials, such as stainless steel and aluminum, which are easier to clean after the work has been done, which allows them to comply with the necessary sanitary standards.
Next, two holes are made in the base of the selected container, from which honey will subsequently flow out. Outside, in the central part, a board is attached as a base, and it should not overlap the previously prepared holes.
In addition, a cassette drum must be present. The number of cassettes mainly depends on the size of the frame with honeycombs. For production, a dense metal mesh equipped with large cells is used.
When the engine rotates, honey is separated from the honeycomb frames. Rotation can be carried out in two ways, either electrically or manually. Additionally, for mechanization purposes, honeycomb holders and bicycle pedals can be used as a rotational element (when working manually).
Refrigerator frames are often used as honeycomb holders, which are attached to a previously prepared rectangular frame. The resulting structure is connected to a rotational element (pedals) or an electric drive.
It is noteworthy that the described option is not entirely convenient for working in large apiaries, especially if we are talking about industrial production volumes, since it requires enormous physical exertion, which is why it can only be used by amateur beekeepers in small apiaries.
Most often, the electric drive operates from the network, despite this, you can assemble it yourself with your own hands (which is very difficult to do even for an experienced engineer), or it can be purchased at a specialized store, which requires significant financial costs.
Drive installation
When collecting honey, it is recommended to place the device on a wooden cross so that there is a container under the tap for draining the product. And if there is only one beekeeper working in the apiary, then while he is unsealing the honeycombs, the honey extractor is idle; When pumping out honey on a chordial honey extractor, not only the drum is in motion, but also the mechanism for turning the cassettes, the cassettes themselves, levers and the drive. After this, put on the belt cable and tighten the spring. They can be screwed in parallel.
Using a round file, drill a recess of 0.12 cm in the wheel, then use a triangular tool to give it the final wedge-shaped shape. However, not every farmer can afford to buy a rather expensive unit, but manufacturing it, as it turns out, is not very difficult.
Torque, instead of human hands, is provided by an electric motor powered by rechargeable batteries or from a volt network. Operation of the honey extractor The pulley wheels are tightened with a belt using a spring. The braking of the device is smooth. A lighter model is constructed from plywood, fastened with nails or glue.
The device allows you to adjust the speed and time of pumping out honey.
Rotating, it separates the honey from the honeycomb frames. Review of honey extractor with electric drive ABB-100, apiary
Types of motors for driving a honey extractor
Manual labor is replaced by the following types of engines:
- low power electric motors;
- electric drill;
- electric current generator.
It is important that the mechanism produces torque; For these purposes, the motor of a washing machine, an electric bicycle, or the gear motor of a car windshield wiper can be useful. They also use devices with reverse (reverse motion), which allows you to pump out honey from both sides without rearranging the frame.
Characteristics
- The main force in the structure is directed to the upper bar; it acts along the plane of the honeycomb. There is no strong lateral pressure that can damage the “cells” of the honeycombs.
- In the absence of rotary cassettes, only the drum rotates - all other elements are static.
- The honeycombs do not come into contact with equipment parts - a guarantee that they will not be infected with dangerous parasites.
- Simultaneous pumping from both sides of the frame is a powerful effect of centrifugal force.
- The main parts are not subject to constant friction and practically do not wear out.
Having a drawing of a radial honey extractor, it is easy to make the device. But this option is suitable for a small apiary. For a large farm, it is better to purchase a factory model.
Manufacturing recommendations
Before you start creating an electric drive, take care to ensure all safety requirements and follow some rules:
- Be extremely careful as you are working with high voltage.
- When selecting parts, give preference only to high-quality elements. If you notice cracks or cuts, it is better to use a new part.
Factory electric drive for honey extractor
Strictly follow the proposed instructions, do not deviate from the recommendations in any way. If possible, use the help or advice of a specialist. If it is not possible to consult with a specialist, then read the existing specialized literature or video tutorials on specialized sites. The work should be carried out in a specially designated place , to which children or animals do not have access. Also, do not allow insects to be present during work!
Principle of operation
The electric drive has a simple operating principle. The prepared frames are placed in a drum with cassettes. Next, the drum is given rotation. The process is carried out using a handle or a motor with a voltage of 12 volts, which has a gearbox and has a couple of hundred watts.
To organize complete flow, the drum should be rotated for at least twelve minutes, and the frames should be turned over cyclically. When an apiary has about ten hives, the work can be done manually. If the quantity is larger, you will need to install an electric drive on the honey extractor, which has a special gearbox of 220 volts. The motor itself has lower pressure, so it is recommended to equip the entire mechanism with an inverter.
The honey extractor drive can have several operating modes. The automation itself will slow down when the process is completely finished. The life of a beekeeper is greatly simplified. After all, you no longer need to monitor the process all the time. Making this device yourself will help you save a lot of money.
Rules for making a radial honey extractor with your own hands
The homemade device is distinguished by its quality. It is not difficult to design it yourself. The radial honey extractor is a metal vat with a height of 700 mm and a diameter of 890 mm. Galvanized iron is used for manufacturing; its bottom is concave and has a cone-shaped shape. Hoops can be attached to the outside; a metal cage should be mounted inside, which presses the cross at the bottom.
Radial honey extractor rotor
The device is difficult to construct with your own hands. It must be equipped with a metal vat, galvanized iron will do, the bottom must be concave, cone-shaped:
- The outer part of the vat must be equipped with special hoops.
- The metal cage is mounted inside the vat, please note that it should fit tightly to the cross, which is located at the bottom.
- Then a glass is installed, which has a steel ball, so the steel rods will hold.
- The rod must be screwed into the cell axis, for the manufacture of which a water pipe is used.
- To prevent honey from flowing along the axis, you need to install a 30 mm iron tube on the top of the vat.
The drawing will help you design a high-quality and reliable device.
Drawing “Radial type honey extractor with 12 frames”
Join the conversation
The electric drive of the honey extractor is very simple to make.
To create a semblance of such a device, we will need a rotary tool.
How does an electric drive work on a homemade honey extractor? In addition, you will need a rheostat; it should be equipped with a nichrome spiral. In the future, it can also serve to loosen and remove the belt in order to twist the honey extractor in different directions.
A washing machine relay is suitable for the switch. Thus, a manual honey extractor is assembled. It would seem like a strange warning.
A do-it-yourself honey extractor is a good idea that can reduce the costs of a novice beekeeper for purchasing equipment, since this unit will become one of its main components. The generator is fixed on a stud, and then the voltage is connected.
Centrifuge manufacturing process
It is easy to build it yourself using ready-made drawings. To prevent the transfer of bee diseases, each apiary must have its own honey extractor. Pumping out honey is always a very tedious process, to which you often have to invite hired workers or relatives. Manufacturing 3. Usually once a season they are brought in to replace the relays, the contacts are burnt.
Then you just have to stock up on the diagram according to which you will make your homemade equipment. The radial honey extractor operates unattended from start to stop. Now the beekeeper's equipment is equipped with the latest technology: it can even be equipped with a touch control panel.
But novice beekeepers may have a hard time. First of all, you need to decide on the most important point - the type of design of your future product. The figure shows the main elements of the honey extractor - the cassette drum, its attachment to the base of the barrel and the drive. The device allows you to adjust the speed and time of pumping out honey. This is done from three sides and closer to the bottom. Electric honey extractor. Reprogramming. Test result.
Features of the electric drive
The honey extractor can operate on electricity. Mechanical pumping of honey takes a lot of effort and time. Making a drive with your own hands is difficult. It will require fasteners, 21G, 108G generators, as well as pulleys. Taking into account all the dimensions, it is necessary to make a hole in the drive. Spread the pin bushing and attach it to the hardware plate. The generator on which the pulley is placed plays an important role.
Using a pin, the generator is attached, and a voltage of 12 W is connected. Use a thin file to make a small groove on the shoulder of the pulley. As a result, it is desirable to obtain a wedge-shaped shape, attach a belt and a spring, which should be tensioned. You may also be interested in an article about creating a solar wax melter with your own hands with detailed drawings.
With the help of an electric drive, a huge amount of complex work can be accomplished. A mechanical honey extractor can be converted into an electric one. For this purpose, it is necessary to perform a number of works:
- leave the lid located on the tank;
- grind the body to make a removable cover, about two bearings will be used;
- Make a special groove on the side of the bearing to get a driven pulley. Make the carving;
- equip the other end with a bushing, connect it to the cassette rotor;
- make the stand required for the bearing housing;
- to quickly pump out honey products, use a three-phase electric motor with a power of at least 250 W;
- make a double clamp to attach the motor to the tank;
- Equip the honey extractor with a special stand to drain the honey. It must have at least two wooden crosses connected by four posts. At the intersection of the crosses, you need to make a triangle-shaped fastening using glue and nails.
An electric centrifuge can be assembled even at 100 watts using a gearbox or a car glass cleaner.
Many beekeepers claim that this power is too weak, but for most apiaries with small dimensions, it is enough. Using adapters and brackets, all parts must be fastened together. Professional beekeepers attach a timer to the device to know when the process of pumping out honey will end.
Usage
The electric honey extractor is equipped with a toggle switch (control of revolutions), a timer (setting the required time), and revolutions (adjusting the speed of rotation of the cassettes). When you make a unit with an electric drive yourself, it is much easier to work with it.
Before use, the manual gearbox is removed from the structure. The shaft is inserted into the bracket with bearings. The drive is fixed using bolts. Then install the pulley and secure it with nuts. Instead of a drive, a drive is attached, the belt is put on a pulley.
Scheme
Electric drive design
Electric drive design for honey extractor
Recommendations for use
- “Manual” device - before work, clean the gears from rust and lubricate them. Be sure to use a guard to prevent grease from falling into the honey.
- Reinforce the homemade model with hoops (the tank is outside) - at high speeds the honey extractor may collapse.
- You should not immediately select the maximum speed - in the first minutes, set low speed for 1 minute, then medium speed for 1 minute, and then increase.
- There is honey left - the cassette does not need to be cleaned, just put it in for a second cycle.
- Use frames with 4-5 lines of tensioned wire (there are 2 wires in a magazine frame).
Stand for honey extractor
The stand is not a mandatory element of the honey extractor, but if it is present, the operation of the installation becomes simpler and more reliable. It can be made from reinforcement using a welding machine.
The base of the stand is the ring. Its diameter should be larger than the diameter of the honey extractor body. You can use a rim ring from ZIL or KAMAZ. Weld the legs and holder onto the main part of the stand. The height of the structure should be oriented towards the volume of the honey extractor body and its performance.
The stands of the stand should be reinforced with rigid ribs. For long service life of the structure, you need to paint it or coat it with a primer for metal.
You can see how to make a stand for a honey extractor in the following video:
A honey extractor is a necessary equipment for an apiary. You can make it yourself from various materials. To do this, you need to prepare certain tools and materials. It is important to correctly determine the dimensions of the structure and cassettes for it. The success of the honey extractor operation depends on these factors.
Author of the publication
offline 1 year
Ilyina Irina
3
Publications: 79Comments: 0
Required materials and tools
When choosing a suitable material, its resistance to various influences and the permissibility of contact with food are important.
The design can be based on: wood - the device can be assembled entirely on your own or use an ordinary barrel;
plywood – the material is attractive due to its lightness, which is important during operation and the need to transport the honey extractor;
aluminum - light and durable material, low price;
Stainless steel is a durable and affordable material that attracts with its long service life and ease of maintenance;
plastic – light weight, easy to maintain, economical.
For a honey extractor, it is convenient to use an old washing machine, or rather a drum from it. It is better to take the Soviet equipment “Alma-Ata” or “Siberia” as a basis.
Regardless of the material for the installation body, be sure to prepare the following elements:
- container for the final product;
- fittings or metal rods of suitable sizes;
- bearing;
- pulley;
- shaft(axis);
- belt;
- faucet for draining honey;
- nut for fixing the faucet;
- universal silicone sealant;
- mesh on cassettes or wire or thin metal rods for its manufacture;
- corners and aluminum rivets for fixation;
- electric motor for drive;
- protective mesh;
- rotor;
- rheostat (nichrome spiral);
- bracket (vertical movement).
The list of necessary tools depends on the material used to make the honey extractor:
- For woodworking, it is better to use a jigsaw or a circular saw, but you can get by with a regular hacksaw. As fastening materials, stock up on self-tapping screws or nails and the appropriate tool - a screwdriver or drill or hammer. You can use glue instead of fasteners. To level the material, you need a plane (if possible, a jointer).
- When making a plastic honey extractor, you can use a hacksaw, soldering iron, or welding machine.
- When using aluminum or stainless steel, you need an angle grinder.
Do-it-yourself bee layering: from young and old bees
Creating new bee colonies is an important annual process that all beekeepers – both beginners and professionals – face. Bee layering helps to expand the apiary, restore the number of insects after the winter period and is an effective method of combating swarming. In this article you will learn:
- how to properly breed bees;
- what methods of formation of layering do modern beekeepers use;
- what are the advantages and disadvantages of these methods;
- what conditions are considered best for creating a new bee colony.
Although layering can be done in the fall, it is best to layer bees in the spring. In the summer, bees adapt more easily, new colonies grow stronger and grow, having time to make supplies for the winter. But autumn layering also has its advantages.
In essence, layering is the division of the strongest family into two identical or unequal halves. In the latter case, several brood frames and active bees are separated. One part of the insects remains with the same queen, and the second receives a new mother, or the bees hatch her themselves.
If the bee family is weak, add a fertile queen bee to it along with a mature queen bee from a strong colony.
Creating a new bee colony is not an easy task and involves many defining nuances. For example, it is very important:
- pick up brood from a strong family, filling about 7 frames;
- use no more than 1-2 frames;
- select non-flying worker bees for brood, because flying individuals are very aggressive towards the new queen, as a result of which she may die.
We are ready to share with you other subtleties of this process.
Layering of young bees
Layers can be prefabricated or simple. Collective layers of bees are formed from several strong families. This is especially true when bribes are around the corner and it is better not to weaken one particular swarm. Moreover, in the spring bees are more susceptible to various diseases. But if you take bees from 2-4 families, their productivity and performance will remain the same. Simple layering is formed on the basis of one bee colony.
Bee layers are created from young, old or different-aged bees.
The advantage of young animals is that they will absolutely accept any new uterus - fertile or infertile. To obtain a strong and complete layer of young individuals, it is best to wait for the appearance of flying bees. The disadvantage of this method is that if there is a shortage of flying individuals, the family will not receive full development.
