Home » Articles about chickens » Heating a brooder for chickens
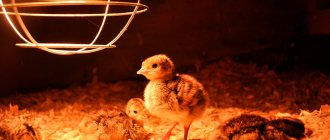
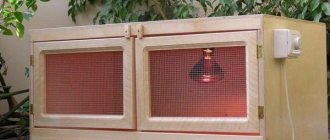
Newly born chicks require special housing conditions. Thermoregulation mechanisms at this age are not yet sufficiently developed, so heating is required in the brooder where the chicks are kept. To ensure this, various devices are used.
Heating options
To maintain a comfortable temperature for chicks in the brooder, use:
- infrared devices - ceramic, transparent and red lamps, IR film;
- heating panels;
- heating cables;
- incandescent lamps.
To provide temporary heating when cleaning the area where the chicks are kept, you can use a water heating pad or a bottle of hot water (wrapped in a cloth). An electric heating pad for animals will also work.
Infrared transparent and red mirror lamps
Infrared lamps consist of:
- flasks - it is made of impact-resistant glass, the inside is covered with a mirror coating that reflects the rays (it creates a directed flow of radiation);
- tungsten filament;
- screw base (most often - chambered for E27).
Screw the IR lamp only into a ceramic socket, since during operation the base heats up to high temperatures (the plastic may melt). To avoid burns from the surface of the flask, it is recommended to use a protective lampshade in the form of a grille.
The flask can be transparent (IKZ) or colored red/blue (IKZK/IKZS). Blue lamps are suitable for medical use, red lamps are used in poultry farming. This light has a positive effect on chicks - it helps strengthen the immune system, reduces the risk of pecking, and stimulates growth.
The IR lamp is ideal for heating chickens - it emits infrared waves. Their range is different - it is indicated in the characteristics. The shorter the waves, the brighter the glow and the larger the heated area. Long-wave equipment produces soft warmth and a dim glow. Power – 50-500 W. In medium-sized brooders, the most commonly used models are 150 and 175 W.
The light field in any of the options is insignificant (especially in the case of colored bulbs) - an additional light source is required. If there is a power switch, you can adjust the temperature.
IR lamps:
- compact;
- work silently;
- do not burn oxygen, do not emit hazardous substances;
- heats up quickly - you feel warm immediately after switching on.
Efficiency is close to 100%. Service life – from 6500 thousand hours. Installation is easy.
Ceramic lamps
When deciding what is the best way to heat a brooder for chickens, it is worth considering another option for infrared devices - a ceramic infrared lamp. Structurally, it is similar to a mirror one, but has an opaque bulb made of shock- and moisture-resistant hard ceramics. Such a device does not emit light at all - it only produces thermal radiation. Having chosen this device, it will not be possible to combine heating and lighting of a brooder for chickens. The length and diameter of the heating element are indicated in the specifications. For brooders, lamps with a power of 75 to 200 W are purchased. Service life – from 10 thousand hours.
IR film
Infrared heating film is most often mounted on the ceiling. Mounting on walls is also allowed. The first option is preferable - heating should be more intense in the center than around the perimeter. This allows you to differentiate between “warm” and “cold” zones. It is not advisable to install film on the floor - it will be difficult to maintain hygiene, and heating the litter soiled with excrement leads to oversaturation of the air with ammonia.
It is recommended to place reflective foil under the film - this increases the efficiency of the heater. Fastening to walls/ceiling is carried out using staples or self-tapping screws. For temporary fastening it is convenient to use regular tape. Optimal power is 200 W. The film, unlike lamps, does not heat up to high temperatures; touching the surface does not lead to burns (maximum temperature: +45°C). Efficiency – 98%. Subject to operating conditions, the service life is very long - 10-25 years.
Heating cable
Heating a chicken brooder with a heating cable is considered cost-effective. Carbon fiber (carbon) threads are placed in a silicone braid. The cable, containing 12 thousand threads, is equipped with sleeves and heat-shrinkable tubing for connecting the sections to the electrical supply wire. The cable is flexible (small bends are allowed), easily attaches to any surface, and has a very long service life - about 40 years. The ends are connected to the electrical wire and connected to the electrical network. To heat a medium-sized brooder, 12 m (120 W) is enough.
When installing the cable, it is mounted on surfaces that are not capable of melting when heated, do not conduct current, or are well insulated. The clamps should not pinch the carbon fiber. When you turn it on for the first time, check the degree of heating - do not allow the braid to soften. To regulate the temperature, you should use a thermostat.
If the installation rules are followed, it is possible to create ideal conditions for the chickens - the area is evenly heated and there are no temperature fluctuations. The cable instantly begins to heat up when turned on and cools down just as quickly when turned off.
Panel
When choosing how to heat a chicken brooder installed in a warm room, you can choose a heating panel.
The heating element is made in the form of a plate and is equipped with adjustable legs. Such a device can replace a hen. When the chickens are cold, they hide under the panel; when it’s hot, they crawl out from under it. These are the conditions closest to natural conditions for the development of young animals. Such a device does not contribute to heating the entire brooder; it creates a local comfort zone.
Chick brooder heating reactor
This heating element provides air heating by blowing. The compact housing with holes houses a heating element and a fan. The device operates in 3 power modes - 100/200/300 W. It is connected like a regular lamp (screwed into the socket). Light sources are LEDs (3 pcs.).
Incandescent lamps
If the brooder is located in a warm room, then 1-2 incandescent lamps with a power of 70 W can be used for heating (the quantity depends on the area). In the future, less powerful models will be required. You can also raise and lower the lamps to decrease/increase the temperature. Such heating will cost more than using IR lamps - the energy consumption will be greater, which will result in large sums if the device operates around the clock. An additional disadvantage is that glass flasks break easily. The advantage of this solution is that there is no need to additionally illuminate the brooder.
Heating pad
For pets, heating pads are available in a waterproof case - they are also suitable for chickens. The heating pads are safe, the risk of short circuit is reduced to zero. A remote control is used to regulate heating. Accuracy – ±2 °С. The removable cover makes it easy to maintain hygiene.
Temperature conditions during chick growth
In the first days after the chicks appear, maintaining the temperature regime is especially important , so it must be constantly monitored. To avoid having to check the readings every few hours, it is better to use an electronic control system that maintains the temperature within a given range. As for specific indicators, they are:
- In the first week, it is worth maintaining the temperature from 32 to 35 degrees around the clock.
- In the second week, you can reduce the indicators, the minimum limit is 29 degrees, the maximum is 32.
- In the third week, the average daily temperature should be from 25 to 29 degrees.
- The fourth week - here it is worth maintaining the readings from 22 to 25 degrees.
- In the fifth, sixth and seventh weeks, optimal values range from 21 to 24 degrees.
- Further, chickens are no longer so demanding on the temperature regime, but it is impossible for the indicators to drop below 18 degrees.
At first, not only temperature is important, but also lighting.
In addition to temperature, it is necessary to ensure the correct lighting regime, since it also affects the development of the bird. Here you need to follow simple recommendations:
- In the first 2-3 days, the brooder should be illuminated for 21-23 hours, that is, almost around the clock.
- Over the next 3 weeks, you can gradually reduce the duration of daylight hours; by 21 days it should be approximately 16 hours.
- Next, you need to transfer the chickens to standard conditions with lighting for 10-12 hours.
The red and orange spectrum ensures normal growth of chicks, preventing avian cannibalism and improving reproductive function in the future.
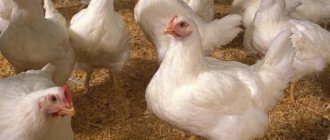
Type of broiler placement and stocking density
The way birds are planted is very important.
In small farms, to raise broilers for meat in the shortest possible time, as a rule, planting without a partition is used. This method allows you to place a large number of birds in the smallest possible area. At poultry farms and farms that raise breeding flocks and breed chickens, it is often practiced to divide the area into sections with a central aisle. In one section, broilers are contained in the following quantities:
- young animals of 300-350 individuals;
- representatives of the parent herd of 120-200 individuals.
When transferring broilers that previously lived in cages to floor housing, you need to make sure that they do not bunch together, especially when the lights are turned off. Otherwise, they may injure each other or even run over each other.
What is ovoscoping of eggs and how to do it correctly? The step-by-step procedure is described in our article.
Artificial molting of chickens is often practiced in poultry farms. Why this is done, you will find out if you read our material.
Combined
A combination lamp for heating chickens is a combination of ultraviolet and infrared radiation.
The positive aspects of such devices include good heat transfer and a beneficial effect on the chickens’ body. As well as disinfecting properties and the possibility of use over large areas.
However, it is worth considering that the cost of such devices is high compared to other heating devices. For example, in Moscow the price of one combined lamp varies from 600 to 1200 rubles.
Other types
Other types of lamps can be used as heating:
- Luminescent. The positive aspects include their cost-effectiveness. But there are also negative indicators. The flickering, which is invisible to the human eye, affects birds. Their vision is sharper. Therefore, they accumulate in remote areas. In these places the litter quickly becomes dirty.
- LED. They eliminate the flickering effect. They are economical. It is possible to adjust the light power. The disadvantage is the high cost.
Other heating devices
Mat and its replacement
In many specialty stores you can see a heating mat for chickens. It works from the electrical network.
But before purchasing such a device, you should know that it has low technical characteristics. They negatively affect the service life. Among the parameters are:
- power: from 40 to 80 W;
- temperature range: from 35 to 45 degrees;
- heating time: 10 to 15 minutes;
- The mat must be supervised during operation.
In addition, under no circumstances should the operating device be filled with water or covered with any object. And if it doesn’t work, break it or pierce it.
Therefore, instead of a mat, it is better to use ordinary electric or water heating pads. They are more resistant to aggressive environments and are easy to use.
Alternative options
As an alternative, you can use plastic water bottles. Before being placed in the brooder, they are wrapped in soft cloth. A significant drawback: you will have to constantly change the contents of the bottle as it cools.
To heat young animals, it is possible to use other homemade heaters of various designs. For example, wood or coal stoves, electric convectors, oil radiators or gas appliances.
Let's sum it up
From the above we can conclude that it is better to use infrared lamps to heat chickens. Compared to other devices, they are effective, economical and safe.
Dear readers of our site, please tell us in the comments whether the recommendations from the article were useful to you. You may be using other methods to keep your chicks warm. Your advice will be useful for novice poultry farmers.
Reposting will help you track the responses to your comment. Special thanks for the 5 star rating.
Electric lamp
pros
In addition to light, an electric lamp is considered a source of heat. Therefore, poultry farmers often use it to create a comfortable temperature for chickens.
The advantages of this invention include accessibility. This heater can be purchased at any hardware store.
Economical: The electric lamp consumes less energy than other bird warmers.
In addition to heat, light bulbs emit a lot of light. Moreover, it is easy to use.
Minuses
Among the disadvantages: low heat transfer, not designed for a large number of young animals. Short service life, which is usually about 1500 hours.
Using an electric lamp may cause a fire. Therefore, it should be mounted as far as possible from flammable materials.
When choosing such devices, you should pay attention to the power consumption, on which the output of heat and light will depend. For example, one 20 W light bulb will produce no more than 250 lm.
Is it possible to do without electrics?
An alternative to electric heaters are gas and stove heating systems that are traditional in our region. Each of them has its own advantages, disadvantages and conditions for rational use, but in any case, such heating of the room will help cope with any sudden drops in temperature.
Using a potbelly stove
An ordinary heating stove is the easiest way to heat a chicken coop, regardless of the climatic conditions of the region. This heating system consists of a metal combustion chamber (boiler) and a chimney. During the combustion of fuel, heat is released, which heats the surrounding air through the walls of the stove.
This heating system is quite practical. It does not require additional maintenance costs, and absolutely any non-toxic material can be used as fuel. However, building heating using a potbelly stove is not so simple. In addition to the boiler and ventilation pipe, the system requires strict compliance with all fire safety standards, since the potbelly stove requires heating with an almost open flame.
Advantages of a potbelly stove:
- cheapness;
- low fuel costs;
- practicality and ease of care;
- ease of installation of the heating system.
Disadvantages of a potbelly stove:
- low fire safety;
- you need to add fuel yourself;
- emits an unpleasant odor during operation.
Heating a chicken coop with gas
Gas heating is the most effective way to create the required temperature in the chicken coop. Gas heating systems can be of two types: water and convector. The water system is a chain of a boiler, heating elements and a flammable gas exhaust system. During the combustion of fuel, heat is released, which is used to heat water.
As water circulates through the system, it gives off its heat to the radiators, which directly heat the room. Convector heating is a system of point heating elements - convectors. They function like electric convectors, but the heating element is heated by burning gas in a sealed chamber of the device.
Advantages of gas heating systems:
- quick heating of the room;
- energy efficiency;
- high fire safety;
- absence of unpleasant odor during fuel combustion.
Disadvantages of gas heating systems:
- high cost of equipment;
- the need for constant monitoring of the health of the gas supply system;
- high cost of fuel.
Heating a chicken coop is one of the most important processes in caring for and raising poultry. Optimal climatic conditions for chickens throughout the year are the key to their good health and high egg production. This process must be approached as carefully as possible, since this directly affects the farming value of each individual on the farm. Therefore, the choice of the optimal heating system should be made not only on the basis of personal preferences, but also according to the efficiency and feasibility of the funds spent on it.
Heated floor for chickens in a chicken coop
In areas where the climatic conditions are harsh and the winters are snowy and cold, chicken coop owners strive to properly insulate them so that the chickens live on dry litter and do not stop laying eggs. For this, household owners build foundations, use wooden coverings, and special devices. Today, they also have access to heated floors on a wooden covering or foundation screed.
It works more efficiently than an infrared heater, which does not cope well with its tasks.
Attention! There is a lot of fluff and feathers in the chicken coop, which constantly pollute the air and can catch fire at any moment, damaging the heating elements.
When installing a heated floor, this problem does not arise - the heating elements do not come into contact with the feather or bedding - it is impossible to spoil the system.
Construction
Building a winter chicken coop with your own hands begins with the foundation. There are several optimal options.
Pile is the cheapest and easiest to implement. The weight of screw piles is small, so one person can install them. The screw blades in the form of empty metal pipes are 2.5 meters long and can be easily screwed into any soil, and installing such a foundation will not take more than an hour. The area needs to be marked according to the size of the future chicken coop. It is best to do this using a rope with pegs. Next, you need to mark the places where the piles will stand. First you should screw in those that will be in the corners of the room, and then all the rest. The piles should be installed at a distance of one and a half or two meters.
Columnar is also good for its efficiency and ease of installation. It can be done without much knowledge or experience. The installation begins by marking with a rope and pegs, then along the perimeter you need to dig holes 50x50 cm wide and 60–70 cm deep. The recesses should be located at a distance of about a meter, about 10 cm deep the holes are filled with a mixture of sand and gravel, then they are well compacted. A brick is placed on top of the cushion and the whole thing is filled with concrete mortar. You need to fill until the level along the stretched rope is reached. When the bases are ready, you can install cabinets or pillars on them. It is imperative that they be 25 centimeters or more above the level. After this, you can fill the area with gravel.
The tape type is difficult to implement, but its reliability is undeniable. To do this, you first need to dig around the perimeter of the poultry house. Then formwork is made, preferably from boards, and filled with concrete
In this case, it is important to adhere to the technology, the intricacies of which can be found out from specialists.
Of course, a chicken coop with a strip foundation takes a little longer to build, since the concrete will have to harden before the main construction work. For example, the construction of a building made of wood can only begin 21 days after pouring, and that of brick – after 28–35 days. The first two foundation options are good because they can create additional ventilation. With them in winter there will be no problems with rotting floors. In addition, during the spring flood period, the chicken coop will not be flooded.
When the foundation is ready, you can continue to build the winter chicken coop according to the selected drawing. The actual construction begins with the installation of the floor. First you need to build a so-called support frame, which is covered with boards from the bottom. Then logs are made at a distance of 50 centimeters. It is desirable that their cross-section be 100x150 centimeters.
Next, they move on to the construction of walls. If they are made of timber, then jute fiber must be laid between them, which is necessary to eliminate cracks. For walls made of OSB, you first need to make a frame of beams arranged in a grid. The walls must be sheathed on both sides to be able to fill them with insulation.
Windows and doors need to be made during the construction of walls
When installing, it is important to check their reliability and the absence of cracks. An important point is ventilation, which is easily organized using the simplest pipe
The penultimate touch is the roof, which can be pitched or gable. It is necessary to take care of its waterproofing, for which roofing felt is suitable. The last point is the creation of artificial light and the interior arrangement of the barn
It is important that chickens and moisture cannot reach the wires. It is best to place them in special plastic boxes
You need to lay a mat on the floor with a height of 7 centimeters. A beam with a diameter of about 6 centimeters is perfect for perches. Perches with a total length of 1.7 meters are enough for 10 chickens. Nests measuring 50x50 cm can be made from any materials, for example, wood, old tires. The main thing is that there are at least two of them. Drinkers and feeders can be wall-mounted or floor-mounted. The main thing is that the chickens feel comfortable using them. The very last thing you need to do with your own hands is to build an enclosure.
Infrared
An infrared lamp for heating chickens is often used by novice poultry farmers. This is because the device is considered safe for chicks. It is easy to use and economical. And with proper calculation, it can heat an area of up to 10 square meters.
When using this type of heating, at least two lamps should be mounted above the chick brooder. So that one is in operation and the other is in reserve. This way, it will be possible to switch the lamps in time if one burns out.
The advantages and disadvantages of such devices are described in the article “Using infrared lamps to heat a chicken coop.”
Main advantages
- The conditions for keeping poultry are as close to natural as possible. The result is less injury, better development of the musculoskeletal system, fewer leg problems, and good carcass quality at slaughter. The bird is exposed to less stress, it has a stronger immunity to infections and a high overall body resistance to other diseases, including metabolic disorders.
- When kept free-range, broilers at home receive additional pasture, fresh air and sunlight. All this improves the quality of meat products.
- Floor keeping will not allow an inexperienced farmer to cause significant harm to the poultry in case of violation of growing technology (such as sanitary conditions and planting density). Broilers are not limited in movement and are able to choose the optimal feeding, watering and resting areas for themselves. While in individual cages, due to the carelessness of the staff, the bird can die from lack of air, overheating, lack of water or suffer from a lack of feed.
- To organize floor housing, no special material costs are required for equipment for broilers.
The simplest temporary chicken coop for keeping on the floor (photo from the Internet). There is both a shelter and a walking area.
Lack of heat
A person can always protect himself from the cold - just light a fire, turn on the heating or put on warm clothes. Newly hatched chicks have virtually no protection as their plumage prevents them from keeping warm. Moreover, even adult birds suffer from winter cold, which leads to serious consequences:
- Immunity decreases - the bird becomes susceptible to infectious diseases;
- Activity decreases - the livestock becomes lethargic and lifeless;
- Egg production decreases - the number of eggs decreases by two or more times.
There is nothing good about hypothermia. And the chicks may even die if they don’t have enough warmth. If an infection appears in the poultry house, it can spread to the entire population.
Lack of heating leads to a slowdown in the rate of development of chickens. Feeling uncomfortable and lacking warmth, they will get sick and their growth will slow down, even if there is plenty of food. If a normal source of life-giving heat is installed in the poultry house, the livestock will feel more comfortable.
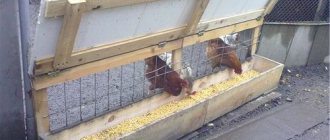
Feeding and watering
Feeders and drinkers for broilers are not fundamentally different from those for laying hens. Let us note once again that when keeping poultry on deep bedding, measures must be taken to ensure that water does not get on the floor. It is best to equip the drinking line with nipples and cups underneath. If you use trough drinkers, then you need to install drip trays under them.
- The feeding front for the first two weeks is at least 2.5 cm per head, watering - at least 1 cm of a trough drinker or 10-12 heads per nipple.
- For older birds, the feeding front increases to 8 cm per head, watering – to 2 cm.
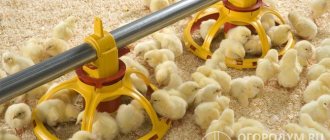
The chick feeding line in this photo is cost-effective for keeping 500 or more broilers.