The long-awaited hour for the novice poultry farmer has come when the construction of the chicken coop is completed, and the young chickens are about to see their new home. Finally, the young birds' housewarming took place, and they happily settled into their new possessions. But with the arrival of cold weather, water streaks began to appear on the walls inside the barn, and an unpleasant smell began to be felt in the air. And the owner began to wonder if there was dampness in the chicken coop, what to do and how to deal with it?
To deal with this issue, you need to find out the root cause of the dampness, and only then decide how to remove dampness from the chicken coop in winter.
February! Caring for chickens and working in the chicken coop
Author: Chicken Ryaba
/ 02 Feb 2022 at 07:32
Good afternoon, experienced and novice poultry farmers! February is not a happy month in the coop for laying hens, at least in the northern hemisphere. Snow and blizzards, freezing rain and wind make walks short and uncomfortable for feathered beauties.
The humidity in February is just off the charts! This can affect your health, we discussed this in our December and January tips.
February! Caring for chickens and working in the chicken coop
This month's goals are to help your girls (and boys!) not get bored and look forward to spring.
Let's deal with bored chickens first.
Chickens are bored
Indeed, in winter chickens lack activity. Make them work, make them move. Sitting cooped up is bad for them, and walking in the humid wind is even worse. What to do?
- We hang cabbage forks on a rope.
- We install mirrors and swings.
- We pour grain into a plastic bottle, make small holes in the walls, it’s a wonderful rattle!
- Stumps and snags will turn the poultry house into a gym.
- We pour a few handfuls directly onto the floor and let them work with their paws.
Dampness in the yard and chicken coop
February can be a very wet month, with rain or snow and then melting. We know that dampness causes colds, and dampness and cold can cause frostbite on combs, earrings and even paws.
Back in October we were talking about ways to combat humidity in a chicken coop. But what if the warming sun turns your walking yard into a mud bath? Wood shavings or sawdust are not an option! They absorb moisture perfectly, but do not get rid of it.
Slipping through muddy slurry can cause sprained or even broken chicken legs. What to do?
- Cover at least part of the walking yard with a canopy. From any material that can be found in the “kulak economy”.
- Plank flooring is a lifesaver, construction pallets are good for this.
- Make a transition through the mud bath to a drier area if you have one.
Inspect the chicken feet. Dirt can harden like cement! In this case, we soak the paws in a basin of warm water or directly under the tap, wipe them dry and release the poor fellow to his sisters.
Alternatively, you can sprinkle wood pellets for cat litter. If they cost around 50 rubles for 7 liters (look in economy markets).
Why do I like this idea? The granules absorb moisture, expand and then crumble. There will be fluffy fine sawdust on the floor of the coop instead of sticky dirt.
By the way, chickens don't eat cat litter! Yes, cheap granules do not contain flavorings, and this is exactly what we need.
Ammonia smell in the chicken coop
Does it smell like ammonia? This is a sure sign that an unscheduled deep cleaning of the litter is required.
- We change partially or completely the litter.
- We clean perches and nests.
- We regularly clean feeders and drinkers.
There is no need to change the litter if you have added poultry bacteria. I recommend it.
Make a compost heap from the litter somewhere in a secluded place, but not in the shade, but in the sun. First, this heap of goodness will harden. But at the end of March it will thaw, move it with a pitchfork 1-2 times a week. Then, already in May, you will be able to apply fertilizer to the beds, under bushes and trees.
4. February is the poorest month for egg production
Spring is coming and your laying hens will turn into egg machine guns! In the meantime, regularly remove the clutches from the nest so that some hooligan does not teach her sisters to peck and eat the eggs. It will be difficult to fight this scourge.
What if your laying hens live in an unheated chicken coop? The frost will crack the shell, and a frozen egg will definitely interest bored chickens.
What plants to plant in spring for laying hens
Spring is just around the corner and it's time to think about buying seeds. Both for the garden and for vitamin feeding of the feathered family.
For example, are you planting peppers in February? Then sow more, if you have a lot of seeds, you can feed the chickens with seedlings. And in general, sow seedlings with a large supply so that you have something to treat your girls on March 8th!
I advise you to germinate excess seeds and old seeds in a jar, this will be a belly festival for our beauties! Look at the photo, how beautiful it turns out.
It is important to continue to germinate any grain, this will strengthen the laying hens’ immunity in February, don’t be lazy!
Good luck, enjoy a snowy February!
PS Interesting, February 23rd on Sunday. How vigorously will our Defenders celebrate the holiday if they don’t have to go to work on Monday? With wild screams and firecrackers? This will scare the chickens and upset loving wives.
Happy New Year, guys!
Share your experience in the comments.
Subscribe to site updates and our channel “Chicken” in Yandex.
See you later, colleagues, and in the meantime we will prepare new and interesting information for you.
In the comments you can add your photos of laying hens, roosters and chicks! Or other poultry. We're curious, what kind of chicken coop do you have?
Did you like the article? Share with friends on social networks:
Causes
As a rule, due to strong temperature changes and high humidity in rooms, condensation forms on the walls. And due to freezing of the walls, poor ventilation and improper laying of the floor, the fight against dampness turns into an unequal battle, in which, often, the poultry farmer suffers losses.
In order for the birds to live healthy, the barn must maintain a positive temperature, and since heating in such rooms, as a rule, is not provided, it is worth thinking about insulating the walls. This is necessary so that the heat is retained inside and the cold does not pass outside. Some people use what is called foil heat reflector and line the walls inside the shed with it. Thus, making a common mistake, since although it retains heat inside and is not allowed into the wall, it is not a barrier to cold and moisture outside. Consequently, such insulation is not effective and, on the contrary, condensation may increase.
TV on the wall in the living room photo
Siding has become a new fashionable style for cladding the facades of buildings. It is a cladding of the walls of buildings and has two functions: protecting the wall from external influences (rain, wind, sun, snow) and aesthetic (facade decor). But as you can see, this has nothing to do with wall insulation. It should be noted that many people resort to this method in the hope of improving climatic conditions for their birds, but in the end the situation does not change.
Desperately trying to cover the internal walls with foam rubber, polystyrene foam, felt, felt, mineral wool in the hope of preserving such precious heat, the owner ends up with fungus on the walls and cracked plaster. All this happens due to the fact that the external walls, heated in the summer, are exposed to squalls of wind, snow and rain in the fall and winter. Due to the temperature difference between the outer and inner parts of the wall, a dew point forms inside under the insulation, and water begins to appear between the insulation and the wall. This in turn leads to sad consequences, both for the room and for the wall itself.
There is an opinion that insulating internal walls with clay does not have such consequences and retains heat well, but this is subject to the condition of lining the façade of the chicken coop with clay.
If you delve into the basics of insulation, it is not difficult to conclude that since it is frosty outside, the brick, cement or cinder block will freeze. And taking into account the internal insulation, heat comes from the insulation, and cold comes from the cinder block/brick. As a result, water will flow down the walls, and nothing can handle it. The only correct solution would be to insulate the walls from the outside. Mineral wool, polystyrene foam, polyurethane foam, cellulose insulation, and extruded polystyrene foam are suitable for this. The differences between insulation materials include vapor permeability, thermal conductivity and moisture resistance. To eliminate dampness in the room, materials with increased vapor permeability and moisture resistance are selected. The best option would be extruded polystyrene foam, since its thermal conductivity is not inferior to mineral wool and polystyrene foam, but it does not absorb moisture, almost does not allow air to pass through and is much stronger than foam plastic.
Types and arrangement of winter ventilation in a chicken coop
Who among you loves to eat fried chicken legs? The dietary properties of chicken meat have been proven for a long time. Chicken broth soup can put anyone on their feet, and it’s hard to imagine homemade baking without eggs. This is why chicken has become the most popular poultry to raise. Chickens must be kept in a chicken coop. You can build it yourself. This does not require specific knowledge or skills. To maintain the natural microclimate in the building, ventilation in the chicken coop will be required in winter.
Is ventilation necessary?
Many people ask the question: why install a room ventilation system? To find out why ventilation is needed in a winter chicken coop, it is necessary to consider the main aspects of its need:
- To eliminate excess humidity and dampness in the room;
- To get rid of unpleasant odor;
- To normalize air temperature;
- To remove ammonia vapors in the air.
A chicken coop is a room with a high level of humidity. There are drinking devices, bedding, and perches. They are capable of releasing significant amounts of moisture. If the chicken coop is not equipped with a natural air circulation system, the fumes will settle on the surface. This will cause dampness. In the cold season, this threatens the occurrence of serious diseases in the birds located there.
Chicken droppings and secretions have a persistent unpleasant odor. If the natural circulation of air flows in the room is not regulated, this will not only lead to the appearance of a persistent odor, but will also cause the emergence and development of harmful microbes.
How to solve a problem
Removing dampness with ventilation
In a room with chickens there must be ventilation.
The chicken coop can be made of high-quality materials in compliance with all manufacturing technologies. But in the absence of a ventilation system, the room will have an unfavorable microclimate.
Ventilation must be done so that external air flows dry the internal ones.
Natural method
The easiest way is to provide several windows in the room. This option is often used by novice poultry farmers because it is the easiest. The window needs to be installed on the side of the door.
This type of ventilation works simply. The farmer opens the door and lets fresh air into the room. At the same time, polluted air exits the chicken coop through the window.
The disadvantage of this method of ventilation is possible drafts. Chickens can catch colds with constant ventilation.
The advantage is versatility. The window not only plays the role of ventilation, but also lets daylight into the chicken coop.
Mechanical or supply and exhaust system
This type of ventilation is advisable to use in the cold season, when it is dangerous to keep the window open.
Two pipes are installed in the chicken coop - supply and exhaust. Clean air enters through the first pipe, and dirty air comes out through the second.
Two pipes are enough for a poultry house measuring 10 m2. If the room area is larger, you will have to increase the number of pipes. Otherwise, ventilation will be insufficient.
Step-by-step installation instructions are presented in the article “How to properly ventilate a chicken coop.”
Why and how to sheathe the outside walls of a chicken coop
The chicken will be healthy and productive if the temperature in the coop is maintained at a favorable temperature.
In regions with cold winters, the walls of the poultry house are insulated from the outside to keep it warm inside. If you choose the right material, condensation will be avoided.
Suitable for insulating the walls of a chicken coop:
- expanded polystyrene;
- cellulose insulation;
- polyurethane foam;
- Styrofoam;
- mineral wool.
The materials differ from each other in thermal conductivity, resistance to moisture and vapor permeability. The last two options are necessary to prevent excess moisture in the room. Expanded polystyrene, a gas-filled material, exhibits these properties best.
Do you need to insulate interior walls?
To protect chickens from severe frosts, farmers often try to insulate the internal walls. Felt, foam plastic, foam rubber and other materials are used for this. But the result is condensation and overgrown fungus, which is difficult to remove.
In summer, the walls warm up well under the sun. And then they get very cold due to autumn showers and wind. Due to a sharp change in temperature, a dew point appears in the wall under the insulation and moisture forms. As a result, the walls suffer greatly from water, and the chickens suffer from excessive humidity in the room.
Another common option is to use a foil heat reflector for wall cladding. This material does not release heat from the coop. But at the same time it easily allows water and cold to pass through. Therefore, insulation does not give the desired result and increases the risk of condensation.
Exit
You can insulate walls from the inside with clay. It is able to retain heat, but does not cause condensation. However, clay needs to be used to treat the walls inside and out.
The rest of the instructions are in the article “How to insulate a chicken coop for the winter with your own hands.”
It is better to do without internal wall insulation. If this option is not suitable, it is recommended to use OSB boards or plywood.
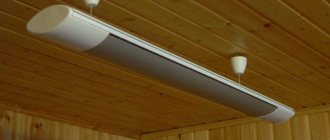
The effect of heaters on humidity
During the winter, some farmers install heaters in their chicken coops to raise the temperature and reduce humidity.
But home appliances cannot dehumidify the air. Only professional devices used in industry can cope with this task.
Heaters may cause higher humidity. When exposed to hot air, condensate evaporates and is absorbed into surfaces. And the constant operation of the device negatively affects the condition of the chickens.
Other options for maintaining a microclimate in cold weather are described in the article “Methods of heating a chicken coop in winter.”
Use of desiccant substances
There is another option for dealing with high humidity - moisture-absorbing substances. For example, adsorbents are silica gel or aluminum gel.
But they only work well in a completely enclosed area. And in the poultry house the doors are constantly opening, the ventilation is running, so the required condition is not met.
In addition, moisture-absorbing substances have their own limits of effectiveness. It is not high for these drugs. To regulate the moisture in the chicken coop, a huge amount of adsorbent would be needed. Therefore, there is no point in using it to eliminate high humidity.
The litter in the chicken coop should be warm and dry: how to achieve this
Those who have known me for a long time know that I not only do gardening and gardening, but also raise poultry. I have experience raising chickens, turkeys and turkeys. Each bird has its own characteristics of care. I want to share a simple way to use litter in your coop for a long time and maintain optimal humidity in the coop.
Proper bedding is the key to bird health
A poultry farmer can use sawdust as bedding if it is possible to obtain it in the required quantity. But more often (and I am no exception) it is easier to purchase straw. Of course, I would like to use it rationally and not spend more than necessary. On my farm, we clean out the old bedding and put new bedding for the birds every 2-3 years. From experience, it turns out that if you stir it up and change it more often, it does not become cleaner, but more work and costs are added.
We must not forget that the important role of the litter is to warm the chicken coop: the straw decomposes (“burns”) and releases heat. In order for this process to proceed steadily, it is necessary to add bacteria. Now stores offer special preparations for this purpose, but any composting product will do. Bacteria are introduced once after replacing the underlying straw. This must be done no later than August, so that living microorganisms multiply and “work” while it is warm.
In our market you can choose a preparation suitable for introducing bacteria into the litter. Take a look at the selection of Biocomposting products.
In addition to bacteria, I use a bedding desiccant . On my YouTube channel I was asked a lot of questions: what is it, what is it for, how to use it. To be honest, I came to use it purely by accident. Once, while buying poultry feed, the seller advised me to buy a desiccant at the same time. I tried it and was very pleased with the result. A similar remedy can also be found in veterinary pharmacies. The desiccant comes from different manufacturers, in different packaging.
Birdcage
First, a metal or wooden frame is constructed. Then, at a height of 20 cm from the bottom, a strong mesh is attached at an angle for rolling the eggs. Under the mesh, at the very bottom of the frame, a pallet (polycarbonate, plywood) is attached. This design allows you to keep the cage clean; the bottom is cleaned a couple of times a month.
The back wall with the roof is made of plywood, and the rest is covered with fine-mesh mesh - chain-link. Hinges and latches are attached to the side wall - this is how the door is made. Drinkers and feeders are installed. To ensure that the chickens feel comfortable and do not reduce their egg production, the cage is placed next to a window or the room is additionally illuminated.
Keeping chickens in winter - 5 things you shouldn't do!
In order to properly keep chickens in winter, you need to provide the birds with three key things - a dry coop, always available water and a balanced diet. Here are five things a smart poultry farmer shouldn't do.
1. The chicken coop is cleaner in winter than in summer - cleaning can be postponed. No! Don't neglect cleanliness in the chicken coop!
Don't confuse your comfort level with what your chickens actually need. Chickens do much better when it's cold outside rather than hot. This is due to the physiological characteristics of chickens, which are able to effectively regulate body temperature at sub-zero temperatures.
However, poultry needs our help to create a comfortable environment in the chicken coop. At the same time, the owner needs to use common sense and knowledge of the basics of poultry farming. So, in winter, chickens eat more and need more water for normal digestion, during which the bird’s body generates the necessary amount of heat for heating.
Accordingly, the more a bird eats, the more litter it produces. Considering that 85% of bird droppings consist of water, timely cleaning of the chicken coop in winter is an extremely important task!
2. Chickens can peck at the ice in the drinker if they want to drink. No! Don't deprive chickens of drinking water!
If the water in the birds' drinking bowl freezes, you will experience a drop in egg production and a deterioration in the health of the chickens. Water is one of the most important attributes of the life of living beings, including chickens. To heat the drinker, you can make a home heater from a large tin of biscuits and a 40-watt light bulb (in case of severe frosts, you can replace it with a light bulb up to 60 watts). All you need is to take a drill, drill a hole in the side of the tin box for the cord, make a fastening like this using a threaded rod, install the drinker with a plastic tray on the structure and connect it to the network during frosts.
If you do not have the opportunity to connect the chicken coop to power, change the water in the drinking bowl in the evening and in the morning. Every day. Necessarily.
3. I’ll hang incandescent light bulbs - it will be light and warm. No! Do not heat the chicken coop with open incandescent lamps!
Remember that incandescent lamps are very fire hazardous and are not intended as a continuous source of light, much less heat. Lamp sockets often cause fires due to short circuits. In addition, the bird can stumble upon a hot lamp and get burned.
If you really need to heat your chicken coop in winter, use safe radiators. And raise the temperature no more than a couple of degrees. Due to the sudden change in heat and cold, you risk undermining the birds’ immunity and causing death. There should not be a sharp contrast between the external temperature outside and inside the chicken coop.
4. I will curtain the windows and walls with old rags - this will keep the chickens warmer. No! Do not create a humid environment in the chicken coop!
While you should carefully check the coop for drafts, which can be fatal to birds, do not deprive the birds of natural ventilation. Excessive moisture must be removed - even at the expense of heat. Ventilate the room regularly and give up the idea of insulating the walls with old blankets - the fabric and padding absorb moisture and become sources of all sorts of diseases and a haven for parasites such as fleas and ticks.
Also, excessive humidity in winter will lead to frostbite in the bird. Frostbite on the legs and combs is very painful for chickens and leads to a drop in fertility and egg production.
Hang a hygrometer in the chicken coop and monitor the readings. The humidity in your chicken coop should not exceed 50-70%.
5. I will feed the chickens only corn - let them get fat, so they will be warmer. No! Don't overfeed your chickens!
Some poultry farmers are confident that if they feed their birds fatty and high-protein foods, the chickens will benefit from this in winter. But birds are not bears; they do not hibernate after accumulating subcutaneous fat. Overfeeding chickens, for example, with corn, will lead to obesity and possibly result in the death of the bird.
Exhaust system
It is considered the easiest option to work with. Quite an effective method. It is an ordinary window or window under the ceiling of the poultry house. If you install it on the side of the door, you can get an additional source of natural light. However, the window should be installed in such a way as to prevent drafts.
In this case, the system will involve 2 objects: a window and a door. So, a flow of fresh air will flow inside through the door. And harmful fumes and excessive humidity will be removed through the window. To optimize the circulation system, you can install a slamming door on it. This will allow you to close it if necessary.
Why are the walls of the chicken coop wet and damp?
Constant dampness in a chicken coop is an unpleasant and dangerous phenomenon. Excess moisture spoils surfaces. Causes the appearance of fungus, mold and insects. Negatively affects the well-being of chickens. They may get sick, which will reduce productivity. The death of the bird cannot be ruled out. The construction of a poultry house must be approached responsibly. The use of low-quality materials, improper installation of the floor and roof, and lack of ventilation causes increased humidity. Let's look at ways to combat it.
What problems arise due to dampness?
Development of pathogenic microorganisms
It is important to maintain the correct microclimate in the chicken coop. Ideal temperature parameters range from 12–18 degrees Celsius. In summer, during intense heat, the temperature should not exceed 25 degrees.
Optimal air humidity is 60-75%. If the indicator is too high due to excessive dampness, a large number of bacteria will appear in the chicken coop.
Even the most powerful antibacterial agent will not completely remove microorganisms if the chicken coop is constantly damp. Bacteria happily settle on wet surfaces and begin to multiply.
Parasites and molds
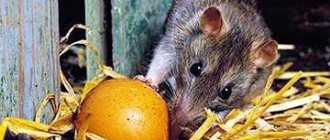
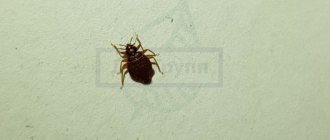
Another danger is moisture accumulation. Rodents and cockroaches thrive in such conditions. Ectoparasites begin to accumulate.
If the surfaces of the coop are constantly wet, mold will appear. Especially on wooden elements. It is difficult to remove even with special chemicals.
Over time, mold eats deep into surfaces. Molds are dangerous for chickens and humans. May cause serious health problems.
What can chickens get sick with?
Due to the large amount of mold, chickens can develop severe allergies. It will worsen the well-being of the birds and greatly reduce egg production.
Also, humidity in the chicken coop causes respiratory problems. Sinusitis and rhinitis may begin - inflammatory processes in the accessory sinuses and nasal passages. In the worst cases, the development of pneumonia and asthma cannot be ruled out.
Due to the dampness, the chickens will feel uncomfortable and lose their appetite. A lack of nutrients will negatively affect their productivity.
Chicken health and quarantine for beginners
Adding new chickens to your flock? By the way, no matter where you buy them, at the market, from a farmer or from a reliable friend - always
isolate them.
Quarantine them away from the rest of the herd for at least the first two weeks after you bring them home.
You don’t know what problems the flock from which new birds came to you might have, and chickens know how to hide illness while they are still standing.
Therefore, it may take several weeks for any signs of illness to become apparent. After this time, you can be sure that new hens or chicks will not introduce disease into your flock.
Let's look at the photo. The chickens are clearly unwell: the combs are pale and the feathers are ruffled.
Examine newcomers daily for signs of disease or infestation, such as lice or mites. Watch for the color of the combs, discharge from the eyes, ears or mouth, coughing, and even a sad appearance. All this may indicate problems.
After two weeks, begin to accustom the newcomers to the general herd. Keep the two teams close, but across the net, so they don't fight. Let the two sides see, hear and smell each other - it’s easier that way. What if you put the new ones in at night and spray deodorant or air freshener into the chicken coop? Also an option. But I had a case of a fight at dawn after such procedures. Those. This method doesn't always work!
Poultry house equipment
The chicken coop must have the appropriate equipment to provide the birds with the right living conditions. The main elements of equipment for poultry farms include drinkers, feed dispensers, nests, perches, ventilation systems, lighting, equipment for manure removal, etc.
The type of litter has an important impact on the health of birds. Coop litter that is too wet, especially in winter, will not absorb gases. In good quality non-agglomerated litter, fermentation occurs, which is beneficial because it provides heat and causes the release of B vitamins.
Cage enclosures with bedding
The best material for this purpose is sawdust, which is highly absorbent and flexible without tending to clump. You can also use straw, divided into pieces 6-8 cm long, and sand. The disadvantage of the latter material is the fact that it does not provide insulation, and manure removed with sand is a less valuable fertilizer. However, if you plan to keep laying hens, sand bedding may be helpful in discouraging the birds from laying eggs behind the nest.
For good chicken health, it is important to keep the litter away from moisture. To do this, it is necessary not only to clean regularly, but also to balance the birds’ diet - too much protein increases the moisture content of the droppings. Excess potassium and sodium chlorides also act. Excess fat in the diet leads, in turn, to rapid contamination of the litter. Also, remember that the material intended for mulch must be free of pathogens and dry, as fungi often grow in it.
Not everyone knows how to properly install feed trays and drinking bowls for chickens. When installing containers in which you provide food, two conditions must be met: firstly, you need to provide chickens with easy access to food, and secondly, prevent scattering and contamination of the feed. A worthy option are trays made of plastic or metal, which are easy to clean. You can buy a cylindrical tray and drinker, which consists of a container for food or water and a base. They can replenish food and water automatically, or you can adjust the amount. Additionally, building this type of feeder and waterer prevents birds from getting into the bowl and contaminating it. The volume and number of trays for food and water are selected depending on the number of birds. There should be 14 cm of longitudinal feed dispenser per hen or one broiler, in the case of a cylindrical tray - 8 cm per hen and 15 cm per broiler. For 10 chickens, one cylindrical drinker with a volume of 10 liters is enough.
Perches for chickens
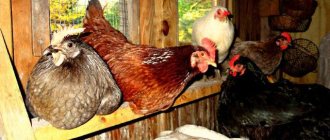
The perch performs a number of important functions for chickens, so you should not forget about it when building a chicken coop. The perch is made of wood, metal or plastic. It is installed at a short distance from the nests. The perch serves as a place for birds to rest and sleep, providing a sense of security.
Wood is the best material for building a perch. Metal structures installed in unheated poultry houses can cause damage and frostbite to the skin of chickens' paws. The advantage of metal and plastic rods is their ease of disinfection and washing.
The top edges of the structure should be rounded, as sharp edges can injure birds. The perch must be durable and provide safe rest for the birds. It most often has a parallel arrangement, with a distance of about 30 cm between each other. The frame should be 20 cm away from the wall of the building.
You can build a perch for chickens with your own hands from pieces of smooth wooden beams with a round cross-section and a diameter of 40 cm. Hang them at a height of no more than 1 m. Try to keep them hanging at the same level - then the chickens will not fight with each other for the highest places . There should be at least 1 m of beds per 4-5 chickens. Under the perch it is worth installing a board for excrement, which is easy to disassemble and wash.
Wooden boxes with a minimum size of 30x40x30 cm are suitable for this purpose. One nest is enough for 3-4 chickens. As a rule, the inside is lined with straw or hay. Make sure that the litter is always dry and clean. The nests should be in a dark, secluded corner of the chicken coop. They are installed next to each other in a row against the wall of the building.
Some systems may be designed with automatically closing doors to prevent birds from sleeping in the nests.
The arrangement of the chicken coop inside is important in the proper maintenance of chickens. Take care of the birds, and they will fully thank you with good productivity.
sadovod.guru

