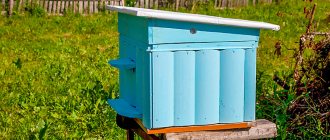
Even the most modern body of evidence has considerable weight. During seasonal work when bees migrate, the apiary owner has to constantly move and rearrange the hives. It is difficult to do without labor mechanization. Apilift is a convenient means of transporting bee houses. How to make such a convenient lift with your own hands.
The lower the overall weight of the apiary cart and the greater the strength, the more convenient and practical it is. The standard option is a platform (according to the size of the hive), a lifting mechanism (lever), two wide wheels, a comfortable long handle and a fastening mechanism.
When compared with a homemade cart, the finished models are strong, lightweight and durable, have a simple lifting mechanism, compact size and a warranty period, which is important.
If you do not have welding skills, then it is better to purchase a ready-made apilift, factory-produced. The price of such mechanization is not high. The main advantages are obvious:
- Stainless steel frame – light and durable. If you buy such material, the cost will not please you;
- properly sized, securely fortified platform;
- several options for clamps at the bottom and top for reliable fastening;
- two wide wheels with all-terrain tires designed for difficult terrain;
- the handles are located in such a way that a person of any height can comfortably use the beekeeper's cart.
The wheel mechanism is equipped with a shock-absorbing system, since hives often have to be transported not on asphalt, but over rough terrain. It is important not to harm the bee family - the factory version eliminates accidental falls.
Another advantage is that the cart folds easily and does not take up much space during winter storage. Self-production does not guarantee such convenience.
Expensive but convenient options, such as Kaptarlift from Hungary, equipped with an electric lift, are a real dream, but they are not cheap. Is it possible to do such an apilift yourself?
It is important to clarify that all imported lifts are designed for polystyrene hives, which are several times lighter than wooden ones.
A few more words about the cons. Ideally, a practicing beekeeper needs two devices:
- for daily work, a small winch - lift, turn, move the hive a little in the sun;
- for loading and unloading onto an on-board vehicle - a kind of miniature loader.
Therefore, many people make lifts themselves, focusing on the individual specifics of the work.
Device and principle of operation
The main parts of a hive lift are:
- Frames . The first frame is motionless, therefore it acts as the skeleton of the structure, and the second one moves parallel to the first and provides reliable support for the load. The frames are made of metal profile pipes with a square cross-section. The load capacity and wear resistance of the finished trolley depend on their thickness.
- Carriage . It bears the weight of the hive, so the load on it is colossal. On the last transverse stops of the carriage, side clamps are fixed, holding the hive in one position. The central stop is needed to fix the torso - the element of the winch that ensures the lifting and lowering of the load.
- Forks . These are elements in the form of strong corners that are placed in the carriage and perform the function of lifting the hives. A load is placed on them.
- Bearings . The design contains 6 bearings, 4 of which are on the bracket, and 2 on the wheels. Thanks to them, the cart is easy to control and moves smoothly.
- Lever arm . Allows you to raise the hive to a considerable height from the ground. The cart needs to be brought to the load, the grip width can be adjusted using a screw and a bracket, and then the hives must be lifted off the ground with a lever and transported to the desired location.
- Wheels with bracket . This component of the trolley is single and acts as a welded guide, but can be removed during disassembly and transportation. The bracket is attached to the frame by tightening two through bolts in the lower and upper parts of the structure, and then fixed with a wing and helps securely fix the hive. Wheels on bearings are needed to move the entire apilift. They should be wide, and also have a strong single base, inflation chambers and a grooved tire for easy slipping.
An apilift differs from a simple trolley precisely in the presence of clamps and a system of levers for push-ups.
The operating principle of this device is simple:
- The side clamps of the structure securely fix the hive.
- The lever handle lifts the load from ground level to a certain height.
- The lift on wheels rolls to the desired location.
- The load is also lowered to the ground using a lever handle.
A design with this operating principle looks like this:
Instead of an introduction
At its core, the discussion of lifts is an endless and sometimes controversial topic. Each owner has his own approach to maintaining an apiary. Some beekeepers actively use homemade carts and lifts. Others operate factory samples of mechanisms. Still others modify the purchased model to suit their needs.
We have already described homemade mechanization tools:
Here we consider a trolley lift for hives in three versions: Devices for transporting hives
And here is an overview of several beekeeping crafts of this type: Trolley and scales are important beekeeping crafts
Here is another interesting idea for self-assembly, which we spotted on a well-known forum:
This model of hive lift is designed to work with Alpine hives. Its main advantage is its low cost. The supporting elements, racks, and crossbar are made of wood. The gate is welded from a metal pipe. The lifting mechanism uses two rollers and a strong rope.
This is one of the variations of the model with lifting blocks. Large collapsible lifts are used for nomadic apiary maintenance. With their help, hives are loaded onto trailers and platforms. And small carts equipped with a lifting unit are designed for internal apiary needs - with their help, houses are moved from one place to another within one point, or transported to a trailer and used together with large collapsible lifts.
Lift requirements and typical drawings
The mobile unit is used to transport heavy and large hives, so it must ensure the safety of the cargo throughout the entire movement. To make this possible, a homemade apilift must have the following characteristics:
- Loading capacity up to 120-130 kg . On average, one compartment weighs 40-42 kg, so the cart can transport either a triple hive or three separate parts.
- Working width approximately 35-55 cm. The sizes of hives can be different, so it is worth providing adjustable side clamps, with which you can grab and adjust its width depending on the dimensions of the load.
Proper placement of the clamps will allow you to secure a heavy load without much physical effort.
- Lifting height up to 130 cm . The installation should raise the hive to a height of up to 130 cm so that it does not drag on the ground while moving.
- Release accuracy is 1 cm . If manufactured correctly, the accuracy of moving the load will be 1 cm, which will greatly facilitate the work of the beekeeper, who will not have to lift and rearrange the load. At the same time, the apilift itself will not feel the mass of the hive, since the pressure on the handle is only 1 kg.
The lifting mechanism of the apilift can be manual or mechanical, but to make work easier, most beekeepers make a cart with their own hands with an automatic drive.
Having decided on the parameters of the future lifting device, it is necessary to prepare its drawing. Here is an approximate drawing of a standard version of a trolley with a load capacity of up to 130 kg:
How to choose commercial hive carts
Making an apilift requires certain knowledge, skills, as well as a little time and patience. That is why not everyone will risk making the structure with their own hands. Fortunately, today global manufacturers offer a large selection of ready-made carts that differ in characteristics, functionality, and dimensions.
When choosing a cart for transporting hives, preference should be given to devices with the following qualities:
- convenience and ease of use;
- metal consumption of the device. The trolley must be made of durable and reliable metal, which guarantees the durability of the structure;
- safety. All the main components of the apilift - forks, handles, holders, clamps - must be of high quality and reliability, made of durable materials;
- puncture-proof wheels . When purchasing, you should choose a cart with wheels made of impenetrable material, for example, polyurethane foam;
- fall protection . It is recommended to give preference to designs that are equipped with an automatic lock attached to the frame and to prevent accidental fall of the mechanism for lifting the load;
- high load capacity . The purchased device must be able to lift a load of up to 150 kg.
In addition, when purchasing, you must ask sellers for product certificates confirming the safety and reliability of its components. Among ready-made trolleys, the most popular lifts are “TP-002” with polyurethane wheels, “M-1” with reinforced wheels with pumping, and “Apilift 1.0 TL” with pneumatic wheels.
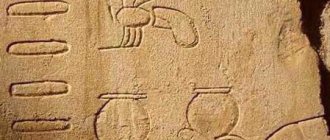
Did you know? Surprisingly, the mating process in bees occurs right in the air and lasts no more than 5 seconds. After this, the drone loses its “male organ,” which remains in the body of the uterus, and itself dies.
Apilift is an excellent assistant for the beekeeper, which makes it possible to significantly simplify the work of maintaining the apiary. A similar design can be purchased in specialized stores or made independently. The last option must be approached with special responsibility, since a well-made device affects not only the quality and efficiency of moving hives, but also the preservation of the safety of the process.
Step-by-step assembly instructions
To assemble the lift you will need the following materials and tools:
- profile pipes with a square cross-section – 40x20, 30x20, 25x25 mm;
- bolts (M6, M8) and nuts;
- handle with non-slip coating (rubberized or any other);
- durable tension springs;
- steel cable with a diameter of 3-4 mm;
- reel with the following parameters: height – 34 mm, outer diameter – 50 mm, inner diameter – 30 mm;
- handle to the reel for winding the cable;
- wheels with an outer diameter of 380-400 mm – 2 pieces;
- rollers with bearings;
- welding machine;
- Bulgarian;
- yardstick.
Having prepared everything you need, you can begin assembling the cart. This process can be divided into three stages, each of which requires separate consideration.
Stage 1: Frame Assembly
The basis of the entire structure is the frame, which must be made as follows:
- Weld the frame from the side posts so that in the finished state its length is 1570 mm and its width is 370 mm.
- Butt-weld 4 pipes perpendicularly to the finished frame. Attach the outer beam to the sidewalls also flat. The cross members at the top and bottom must correspond to the dimensions of the frame pipes (40x20 mm). For the middle crossbars, you need to use smaller pipes (30x20 mm). Install the second beam at a distance of 500 mm from the top cross member, and the third at a distance of 380-400 mm from the bottom.
- Especially for the bearing, make a vertical cut of 200 mm along the length of the frame posts on the outside. Install M6 bolts along its edges, otherwise the bearing will fly out of the groove during operation of the trolley.
- On both sides of the third beam going from above, drill one hole for bolts M. In the future, wheel brackets will be installed in these places.
- Step back 200-300 mm from the top beam and weld rubberized handles to the side pipes.
Stage 2: installing the reel, lifting mechanism and wheels
At this stage, the assembled frame is filled with all the necessary elements that will allow it to transport cargo in the future. They are installed in the following order:
- Install a bearing with a diameter of 40 mm on the upper cross member, maintaining 130 mm from the right edge of the frame. Attach a clamp (fastener) on top of the bearing to prevent the cable from falling out of the block lifting the load.
- On the left side of the frame, also at a distance of 130 mm from the first crossbar, install a roller groove and insert a steel cable into it, the upper free end of which is bolted to the left sidewall.
- Install the coil on the second crossbar from the top, on the front side, keeping a distance of 120 mm from the right edge of the frame. Install an axis for the reel in the bearing, on which the cable will be wound when lifting weights.
- On the opposite side of the coil, also on the second beam, weld a lever measuring 200 mm. It must have a handle that rotates freely around its axis.
- Near the coil and lever, nail a piece of steel rod, which will act as metal stoppers.
- Using a cable, attach the lever handle to the metal tongue and spring. The tongue will help prevent accidental release of a loaded carriage. When at rest, it will be pressed against the stopper by a spring. At this step, the lifting mechanism looks like this:
- Make brackets from a profile pipe measuring 25x25 mm on which to install the wheel axles. For external fixation, nail them with nuts.
- Attach the brackets to the frame using steel rectangular plates measuring 110x25 mm. Visually, the brackets should consist of two pipes measuring 300 and 230 mm, welded perpendicularly and connected to the frame using through bolts M
The structure made according to this scheme easily bends towards the ground at different angles. This is ensured by wheels extending from the brackets.
Stage 3: Installation of the carriage, fork and clamps
The final, but no less important part in the manufacture of apilift. Involves the following actions:
- Assemble the carriage - a lifting unit consisting of numerous parts, including clamps for securing the load. To do this, first make a frame with bearings, the dimensions of which are 720x380 mm. Use a 30x20 mm pipe as the material. In the lower part, make 2 crossbars from a pipe with a diameter of 30x30 mm. They will contain side clamps that grip the hive body.
The hinge tilts under the acting rod, and the square pulling the tube from the side clamp warps. The angle of inclination of the hinge is adjusted using a bolt with a spring, and the adjustment of the clamps depends on this. The greater the slope, the more intense the compression.
- Make clamps from pipes with a diameter of 25x25 mm and a length of 450 mm, onto the edges of which “legs” are welded perpendicularly to hold the load - sections 90 or 130 mm long. To prevent the hive body from slipping, it is advisable to make the part of the “legs” facing inward ribbed. Insert the prepared clamps into the pipes on the carriage, which have a larger diameter.
- Weld a block for the cable in the center of the bottom crossbar of the carriage. The vertical movement of the structure will be carried out by 4 bearings located on the sides of the axial frame.
- To lift the load by the bottom, attach tubes with a diameter of 25x25 mm and a length of 90 mm to the bottom of the carriage, from the sides. To do this, use bolts M. To obtain forks, attach tubes 450-500 mm long to the installed sections. The carriage compression mechanism will be carried out using a lever with a rod.
Carriage
The most complex trolley mechanism, which consists of a large number of parts:
- grip clamps;
- a block for a lifting cable, similar to that attached to the frame, is attached to the middle transverse pipe during manufacturing;
- moves along guides using ball bearings;
- a holder for the lifting fork mechanism is welded to the bottom of the carriage;
- The operation is controlled by the traction lever.
The design and operating principle of the carriage can be understood from the drawings.
The presented video and drawings will help you understand the manufacturing sequence. If you don’t want to spend a lot of money, then a simple lift can be made in two days with your own hands.
Useful tips
When operating a homemade apiary cart, it is worth considering a number of rules:
- Before starting full work with the lift, check it for technical serviceability. For this initial use, use it without a load, paying special attention to the following details:
- fixing screws and nuts, especially in those areas where the cable rollers are secured;
- tight fit of the support-frame bolts fixed through washers;
- completeness of fastenings in the grooves.
- If hives with heavy honeycombs are transported, check that they are securely secured.
- If possible, free the hive from all unnecessary components. In particular, it is worth removing all moving parts of the box that could frighten the bees.
- Check the strength of the frame fastenings inside the box. If the honeycomb breaks during transportation, this will cause aggression among insects. In addition, some of them may die.
- When loading the hive, make sure that the handle lock is secure, as it can pop out when the cart is tilted, which will lead to the load falling.
- When transporting bees, wear protective clothing, and also have a spray bottle and a net with you. All these measures will help protect yourself from insect bites in the event of an accident.
With some effort, the apilift can be assembled with your own hands, which will allow you to significantly save on the purchase of a store-bought apiary cart. In this case, great attention must be paid to the installation of small parts, on which the technical characteristics of the manufactured mobile unit will depend.
0
0
Copy link
Usage
Before starting work, it is necessary to check the components of the structure for compliance with technical requirements. Carefully inspect the location of the fasteners, the fit of the fasteners, and the correct fit of the fasteners into the grooves.
It is important to pay attention to the functioning of the apiary cart during operation. Especially reliable fixation, since it is difficult for insects to survive the stress associated with transportation. For transportation, you need to prepare protective clothing and a spray bottle to prevent bees from attacking in the event of a fall.
Main details
Parts and dimensions for lifting and transporting hives:
Parts and dimensions for lifting and transporting hives Bolts
Frame
Wheel
Wheel bracket
Appearance
A small structure for transporting hives with your own hands is a lightweight and easy-to-use mechanical lift. The following requirements apply to standard models:
- withstand weight up to 120 kg;
- transport hives up to 1100 mm high;
- capture a hive of up to 24 frames with a clamp spread of up to 1000 mm.
The appearance resembles a metal frame with a simplified fork for gripping, like a lift. The structure moves vertically due to two wheels. The movement is transmitted through two handles on top, which are held by the beekeeper.
Removing hail dents using glue and vacuum methods
It’s worth mentioning right away that these methods can only be used if the integrity of the paintwork is not compromised at the point of deformation.
If there are chips or scratches, then you need to get rid of them. You can read how to do this in a separate material on our website. The fact is that the tools described below have a strong mechanical effect on the surface, which can cause delamination of the paintwork. To remove hail dents with your own hands using the glue method, you need the following tools:
Dent removal kit
- minilifter (also called a reverse hammer);
- adhesive mushrooms (pistons) of various diameters;
- glue;
- hot glue gun;
- liquid for removing glue residues;
- hammer;
- Teflon core with a blunt tip.
Choosing a trailer for transporting bees
The most popular trailer models are:
- Model 817730.001 manufactured by MZSA.
- "Tandem" produced by "Kurgan Trailers".
- "Beekeeper" cargo type No. 7135 manufactured by "Progress".
- "Apiary saddle-24" produced by "Os".
- Trailer 817730.001 manufactured by MZSA
Model 817730.001 manufactured by MZSA
One of the most stable. Made of galvanized metal and lined with moisture-resistant plywood.
Its specificity:
- the front and rear parts are reclining;
- maximum weight – 950 kilograms;
- moving parts are treated with a zinc-based composition, which increases service life several times.
Model 817730.001 manufactured by MZSA
Model "Tandem" produced by "Kurgan Trailers"
It allows you to leave space between two rows of hives, so it will be more convenient to move around.
Other features:
- the presence of an automatic dolly wheel, a spare wheel, tie-down belts;
- improved height – 130 centimeters, which simplifies the installation and removal of hives;
- when transporting, only one “floor” of hives is allowed; when stopping, an increase to four is allowed;
Model "Tandem" produced by "Kurgan Trailers"
Model "Beekeeper" produced by "Progress"
It was created for the difficult road surface of our country - it has a special spring suspension.
Specifics:
- side height – 15 centimeters;
- load capacity – 1 ton;
- The bottom is made of plywood, resistant to moisture.
Model "Beekeeper" produced by "Progress"
Model "Apiary saddle-24" produced by "Axis"
It accommodates 24 hives, which can be placed without disturbing natural air exchange.
Other features:
- there is a retractable part for 8 hives;
- There is a coasting brake.
Model "Apiary saddle-24" produced by "Axis"
Useful video review about MZSA trailers.
Varieties
There are two types: manual and mechanical. The choice of one drive or another depends on the size of the apiary and the daily load on the beekeeper. If the apiary is small and the evidence is small, then it will be more convenient to operate the cart using a manual drive. To lower or raise the hive, it is enough to apply a small force to the drive handle.
But if the apiary occupies large areas, then to save worker effort it is easier to install a mechanical drive. Thus, you won’t have to put any effort into working. And the apiary transport itself can be used for the safe transportation of the largest and heaviest hives.
What is apilift
A bee trolley is a lifting structure that is equipped with a special part for gripping and wheels for movement. The holding part has bolted fasteners that securely fix the hive and prevent it from falling. All clamps are adjustable, which makes it possible to transport bee houses of any size. In addition, each apilift is equipped with lifting parts - levers, blocks, clamps.
A cart for transporting bee hives must meet the following characteristics:
- the load capacity of the structure should be up to 150 kg;
- the height of the transported hive is 1300 mm;
- ability to capture an object within the range of 340–530 mm.
The lift can be manual or mechanized, while most beekeepers prefer the first option, since the second significantly complicates working with the structure.
The principle of operation of the trolley is quite simple:
- use a special device to move the side clamps;
- after the required distance is fixed, the object body is installed;
- A lever is used to lift the load.
After completing the steps, the hive can be transported to any place.